🌐
User Manual

JH 13C Series Infrared Heater

Important Safety Notice
⚠️ IMPORTANT SAFETY INSTRUCTIONS
  • Read all instructions carefully before installing or using this heater.
  • Installation must be performed by qualified personnel only.
  • Do not cover the heater — risk of overheating and fire.
  • The heater must be installed at least 2.2 m above ground level.
  • The heating surface becomes extremely hot during operation — do not touch.
  • Keep flammable and combustible materials at a safe distance.
  • Do not install the heater directly below a power socket.
  • Ensure the power supply is equipped with earth leakage protection.
  • Disconnect power before cleaning or when not in use.
1. Product Overview

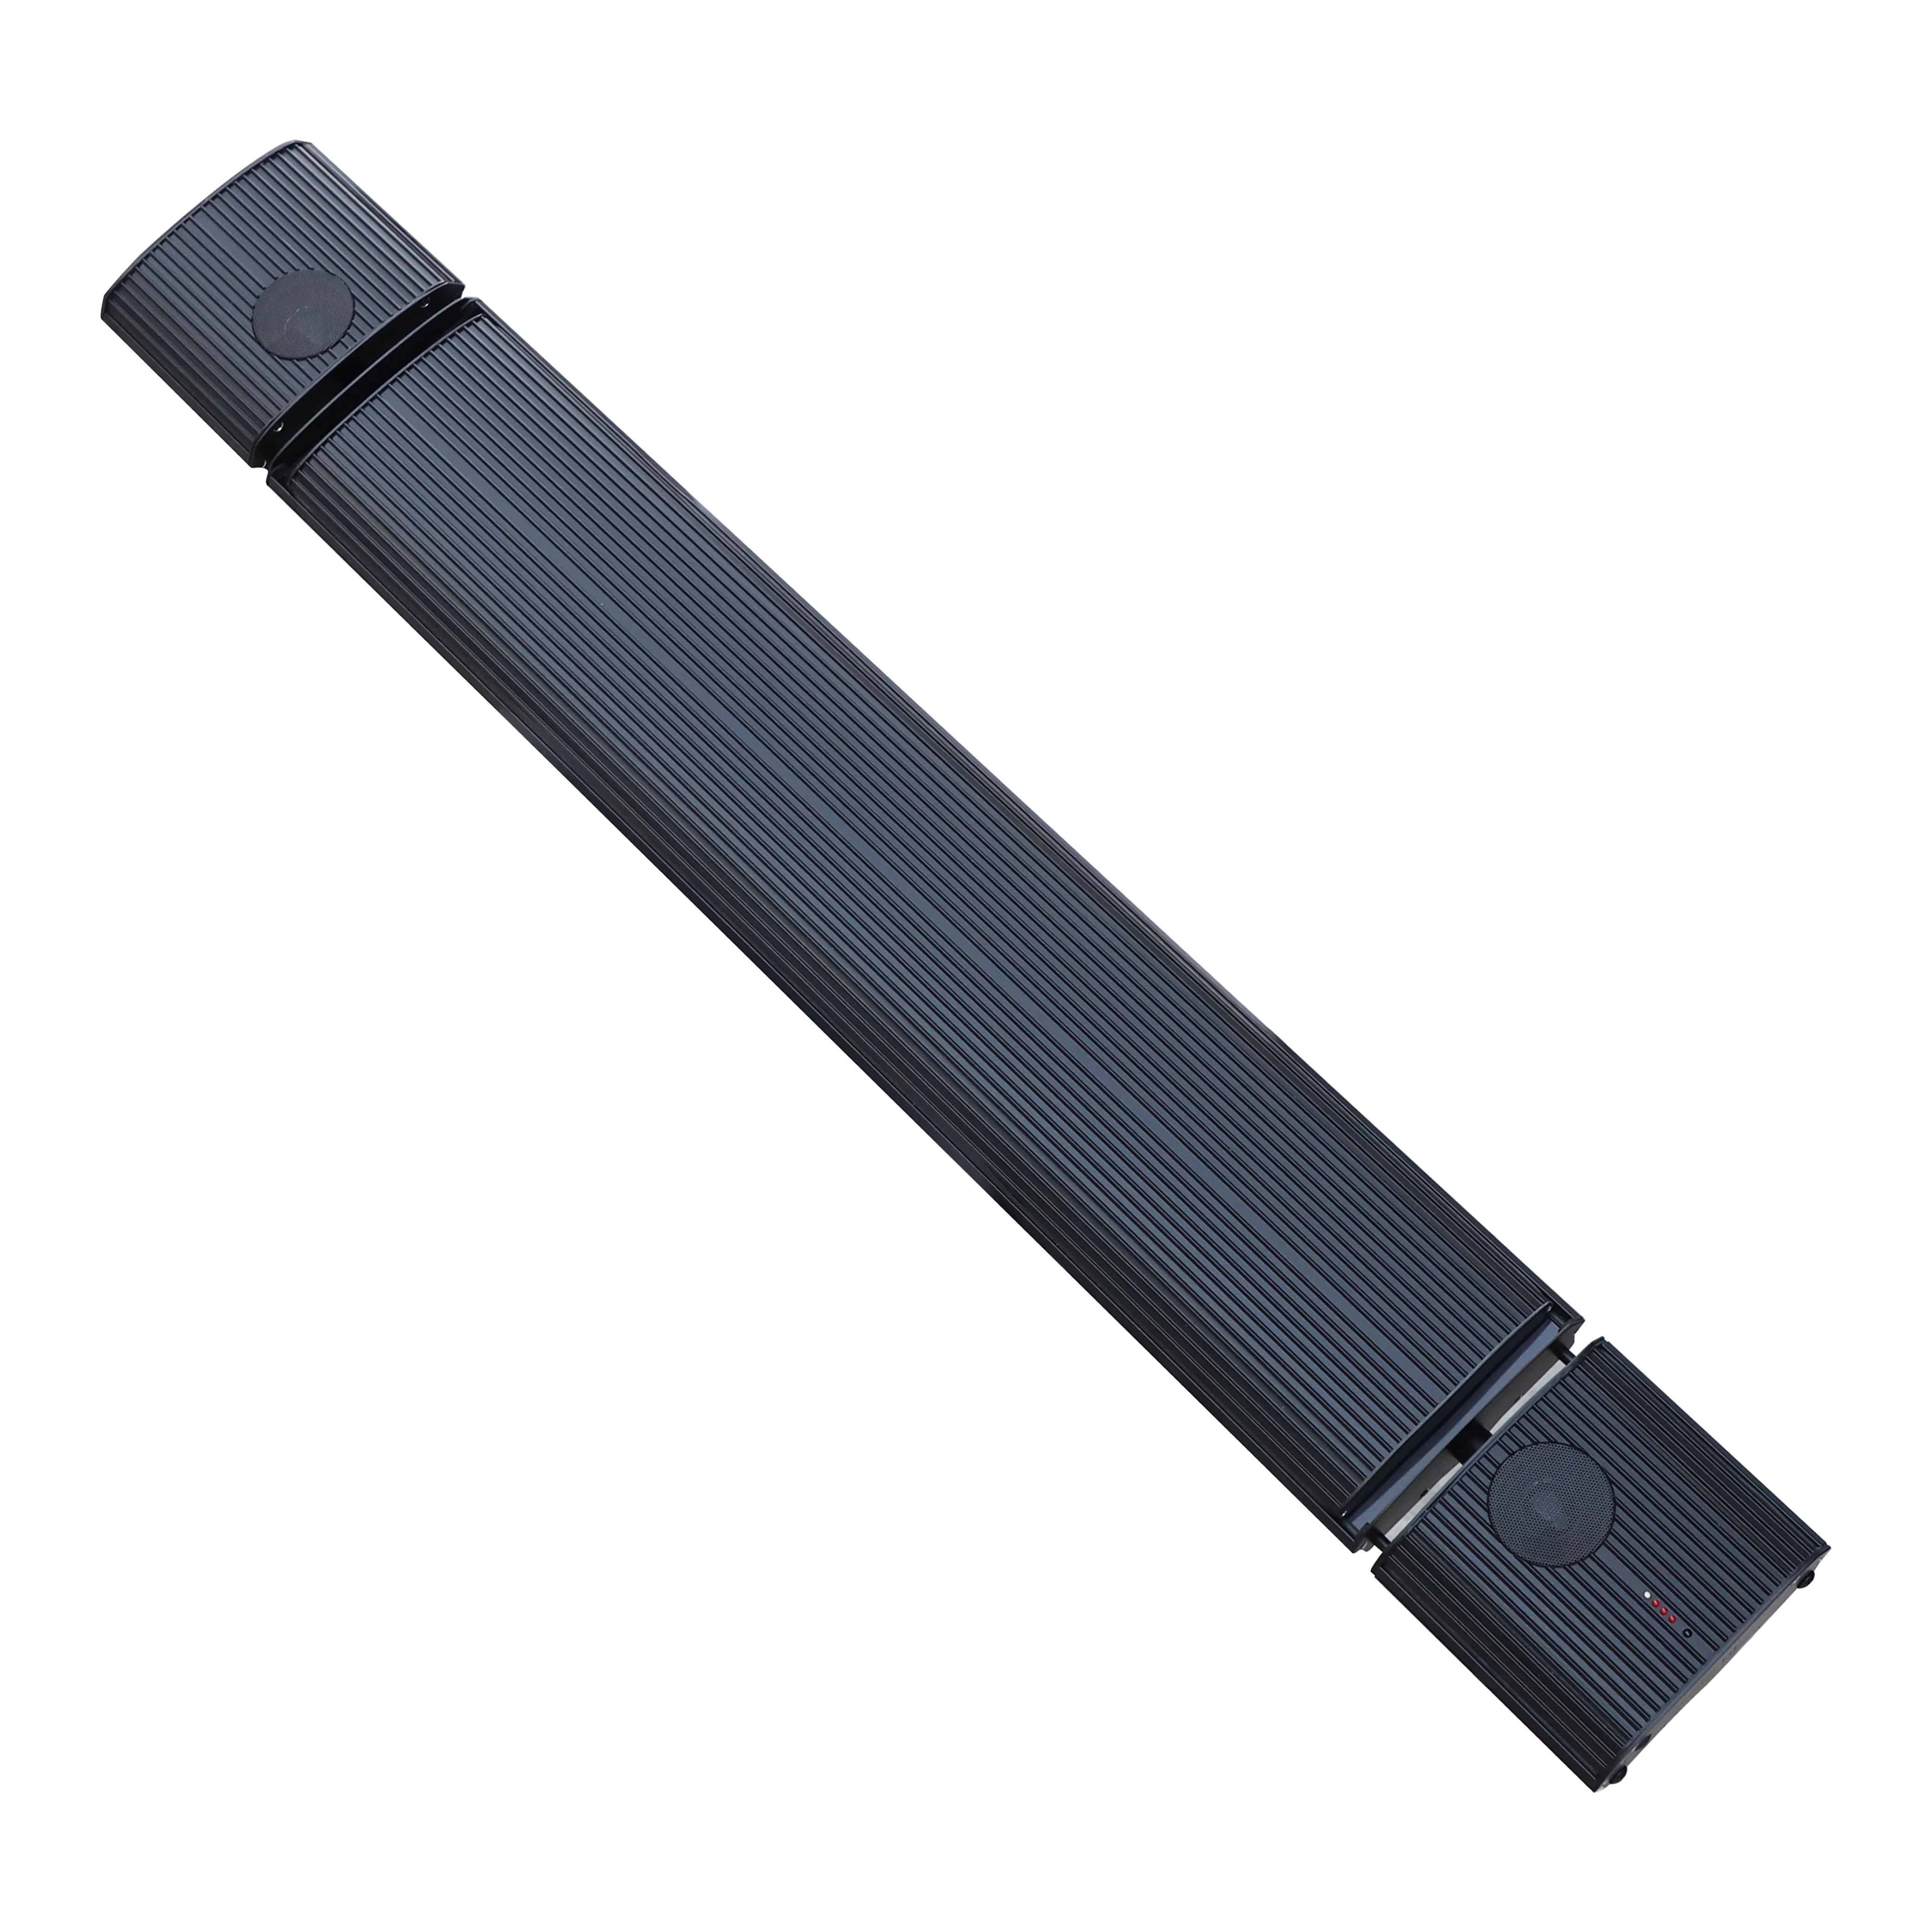
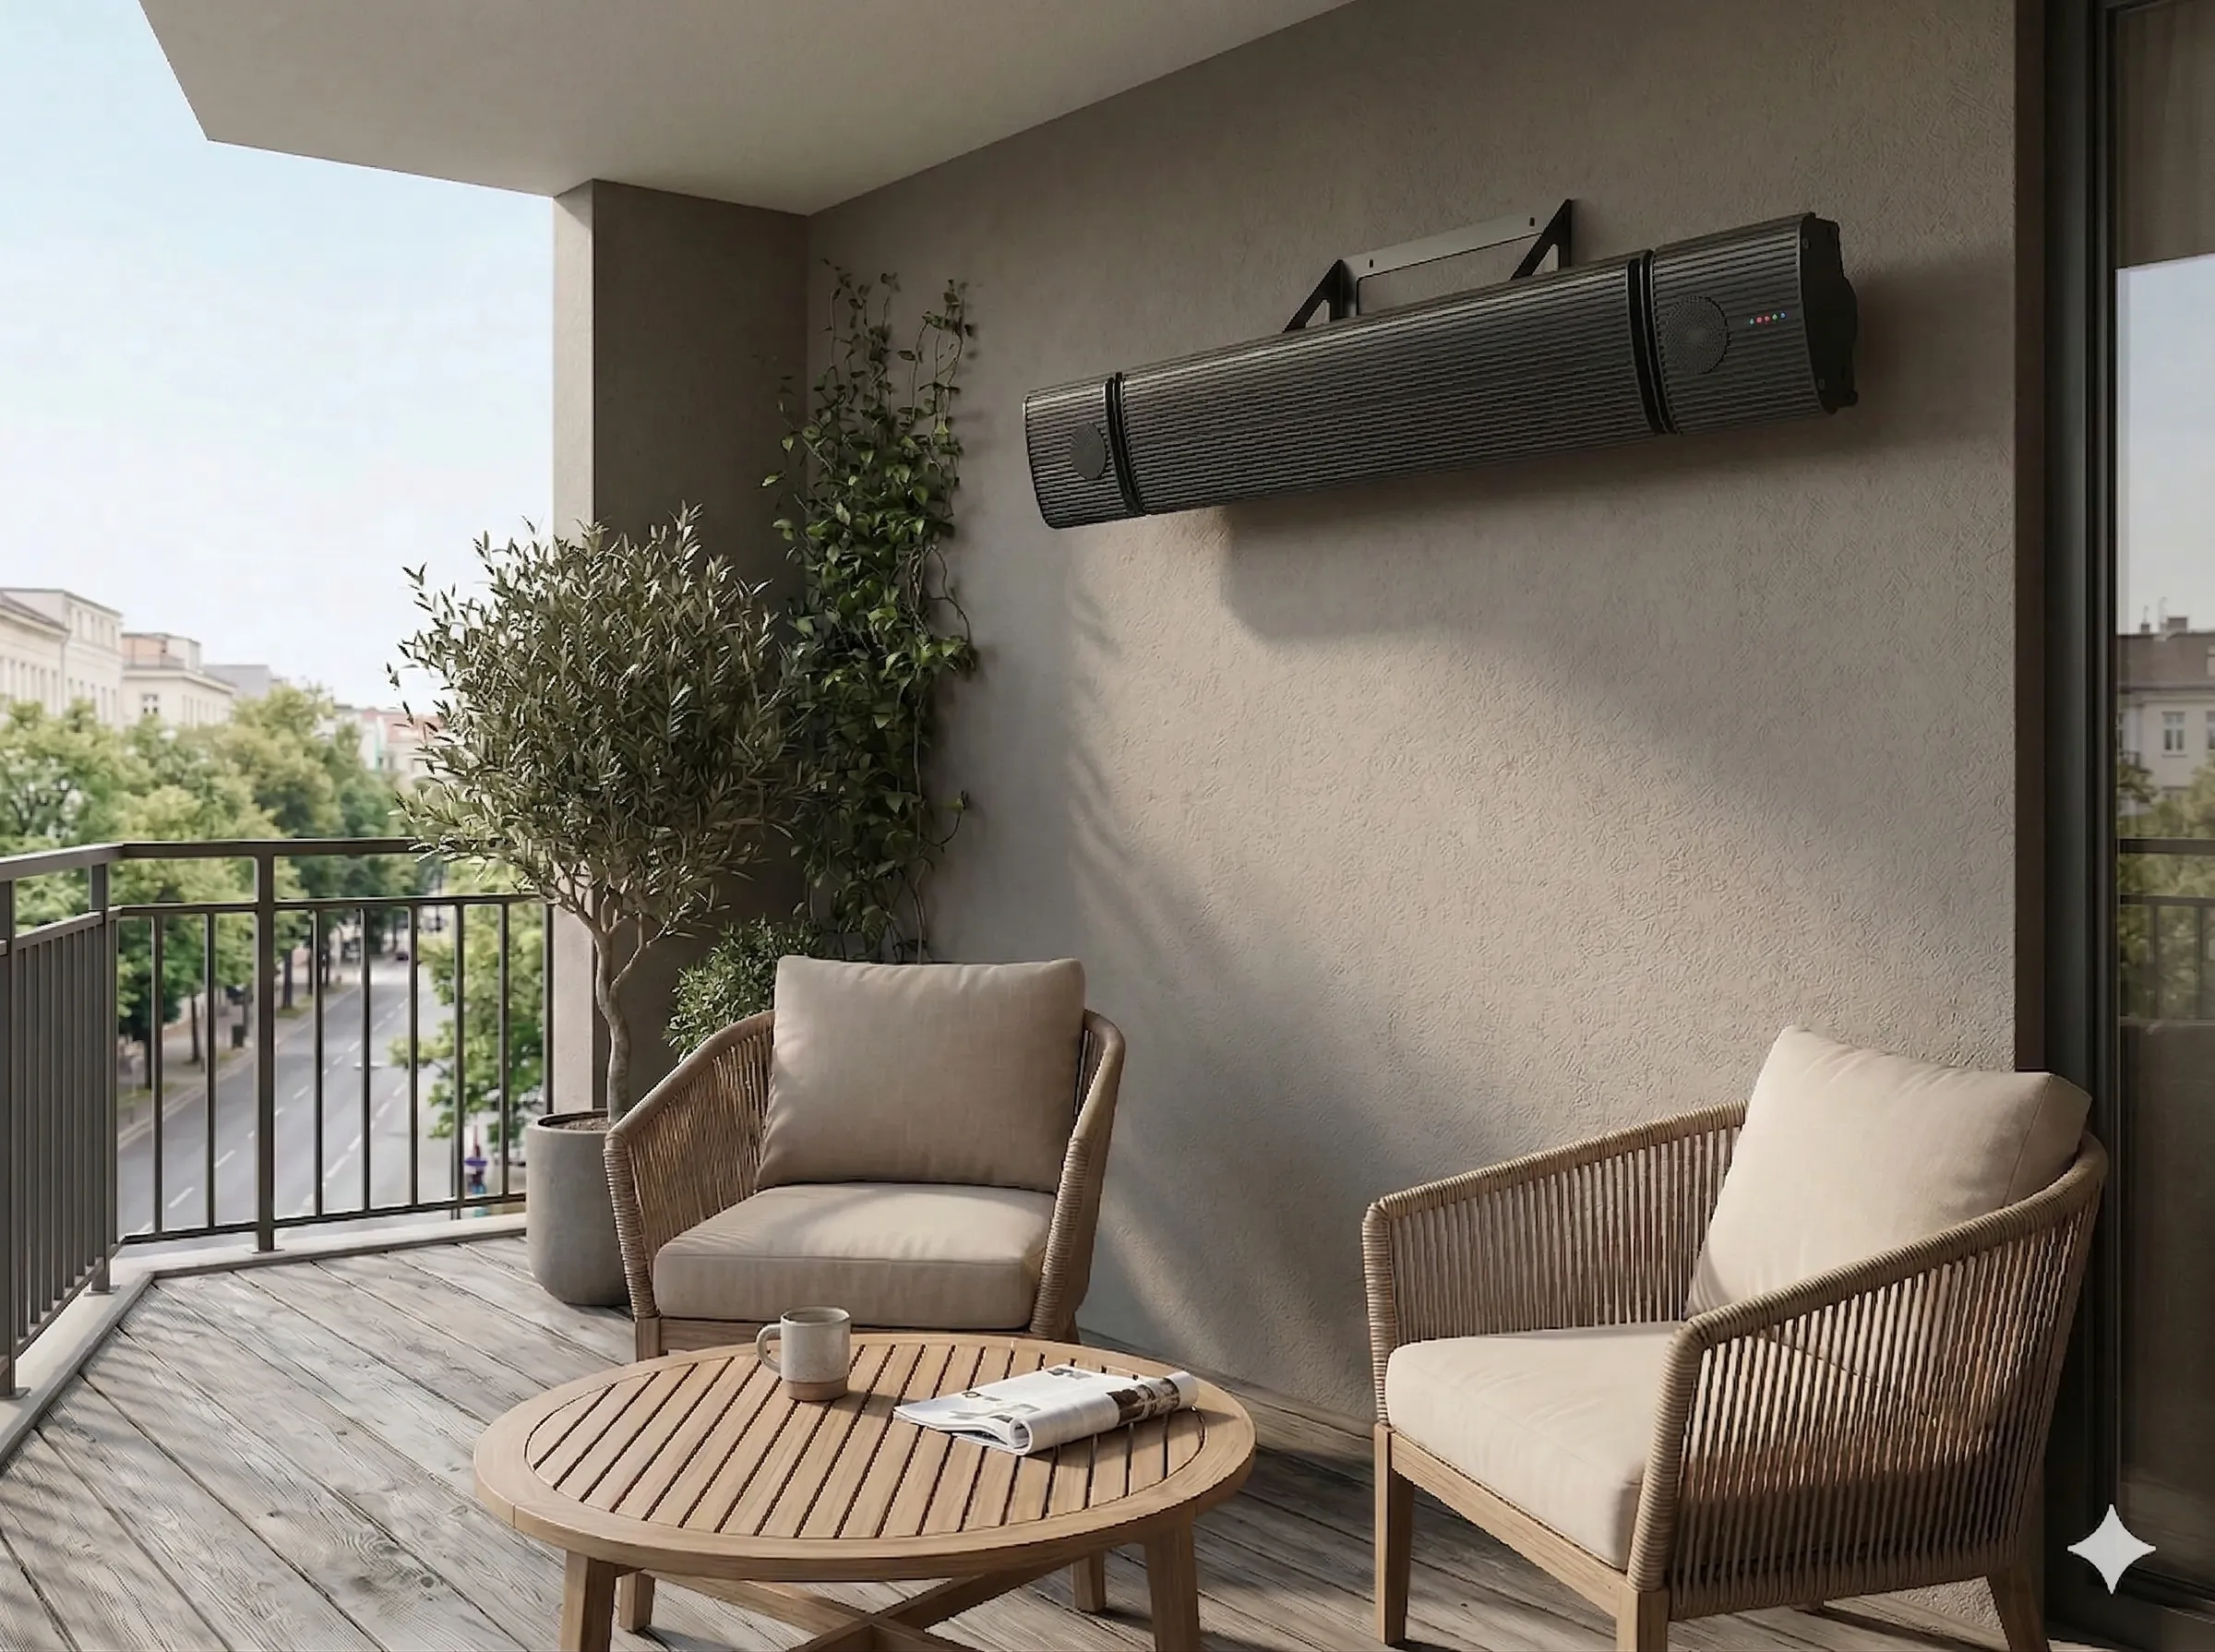
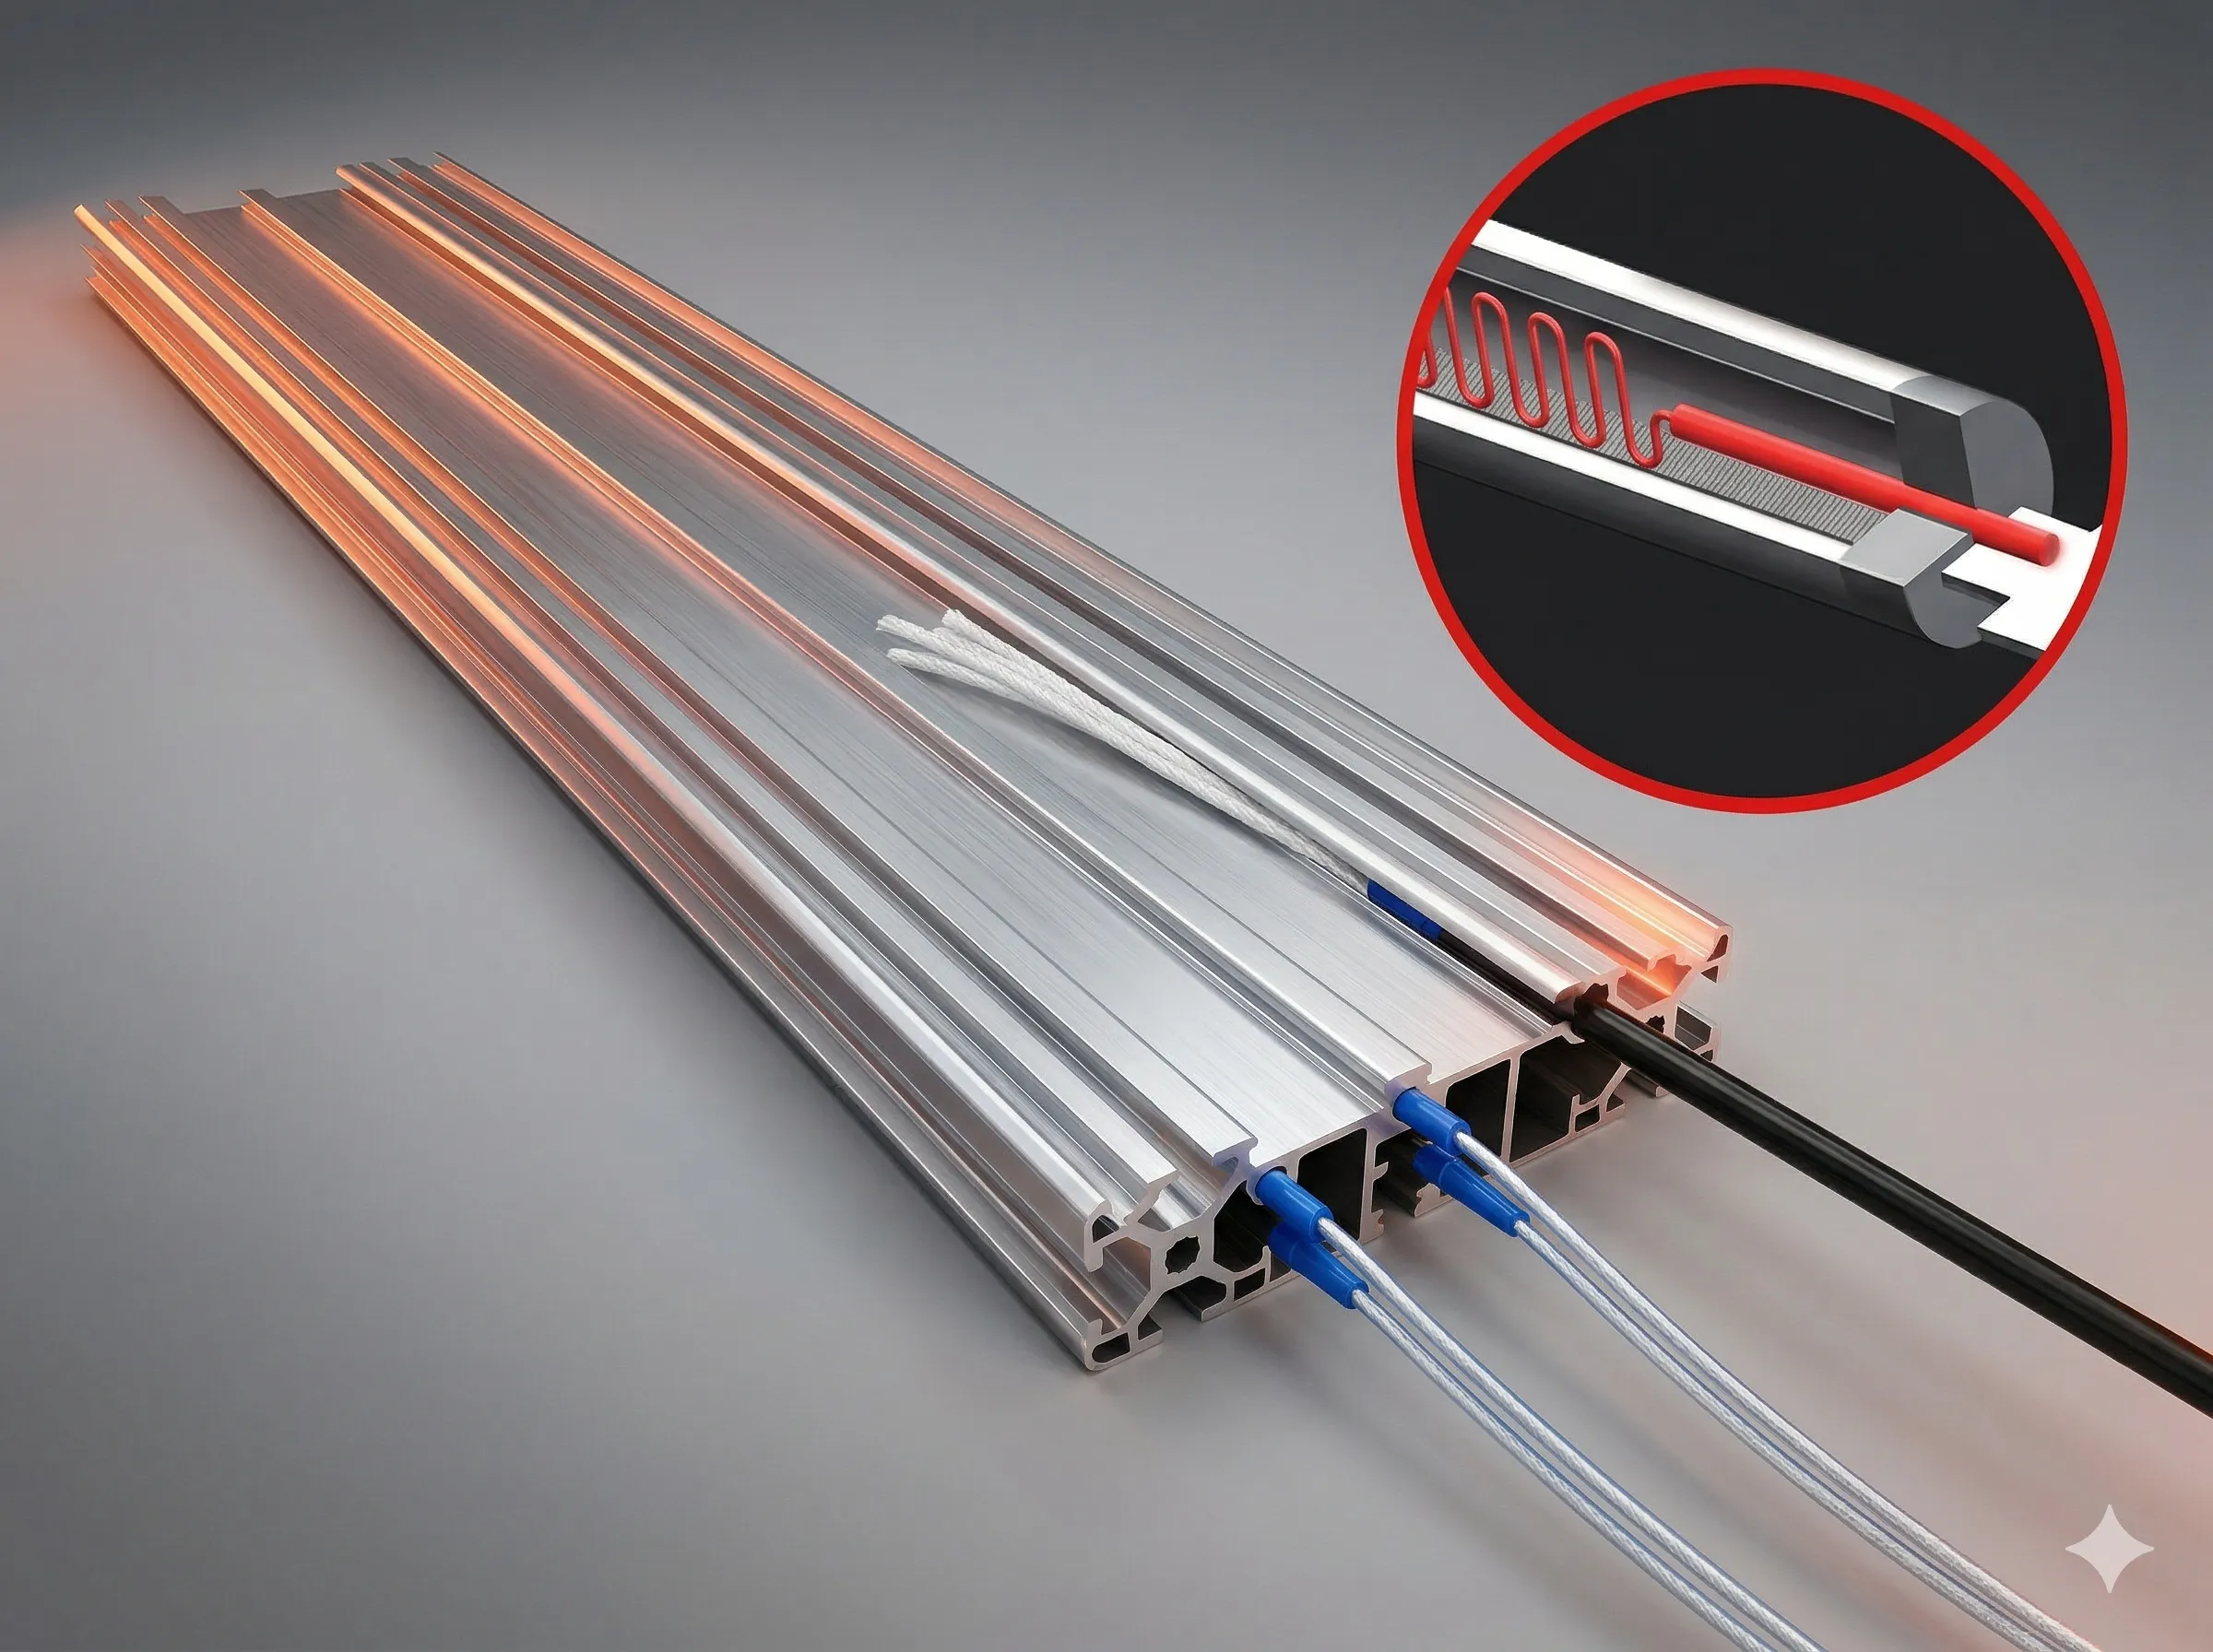
The 13C Series radiant heater is designed with a specially coated aluminum radiation panel. The heat generated by the heating element is radiated directly from the panel surface and absorbed by people, walls, ceilings, floors, furniture, and other objects, creating a sun-like heating experience. Since it does not create air convection, it helps maintain clean indoor air and a comfortable humidity level.

2. Key Features
🌡️

Comfortable

No wind, no strong light, and no odor during operation. Helps keep indoor air clean without floating dust.

Energy-Saving

High heat generation efficiency and effective radiant heating help save energy while maintaining warmth.

🔒

Reliable

The indoor temperature can be adjusted freely and is not limited by the traditional heating season.

☀️

Far-Infrared Comfort

Far-infrared radiant heat provides a natural, sun-like warmth experience.

🎵

Bluetooth Speaker

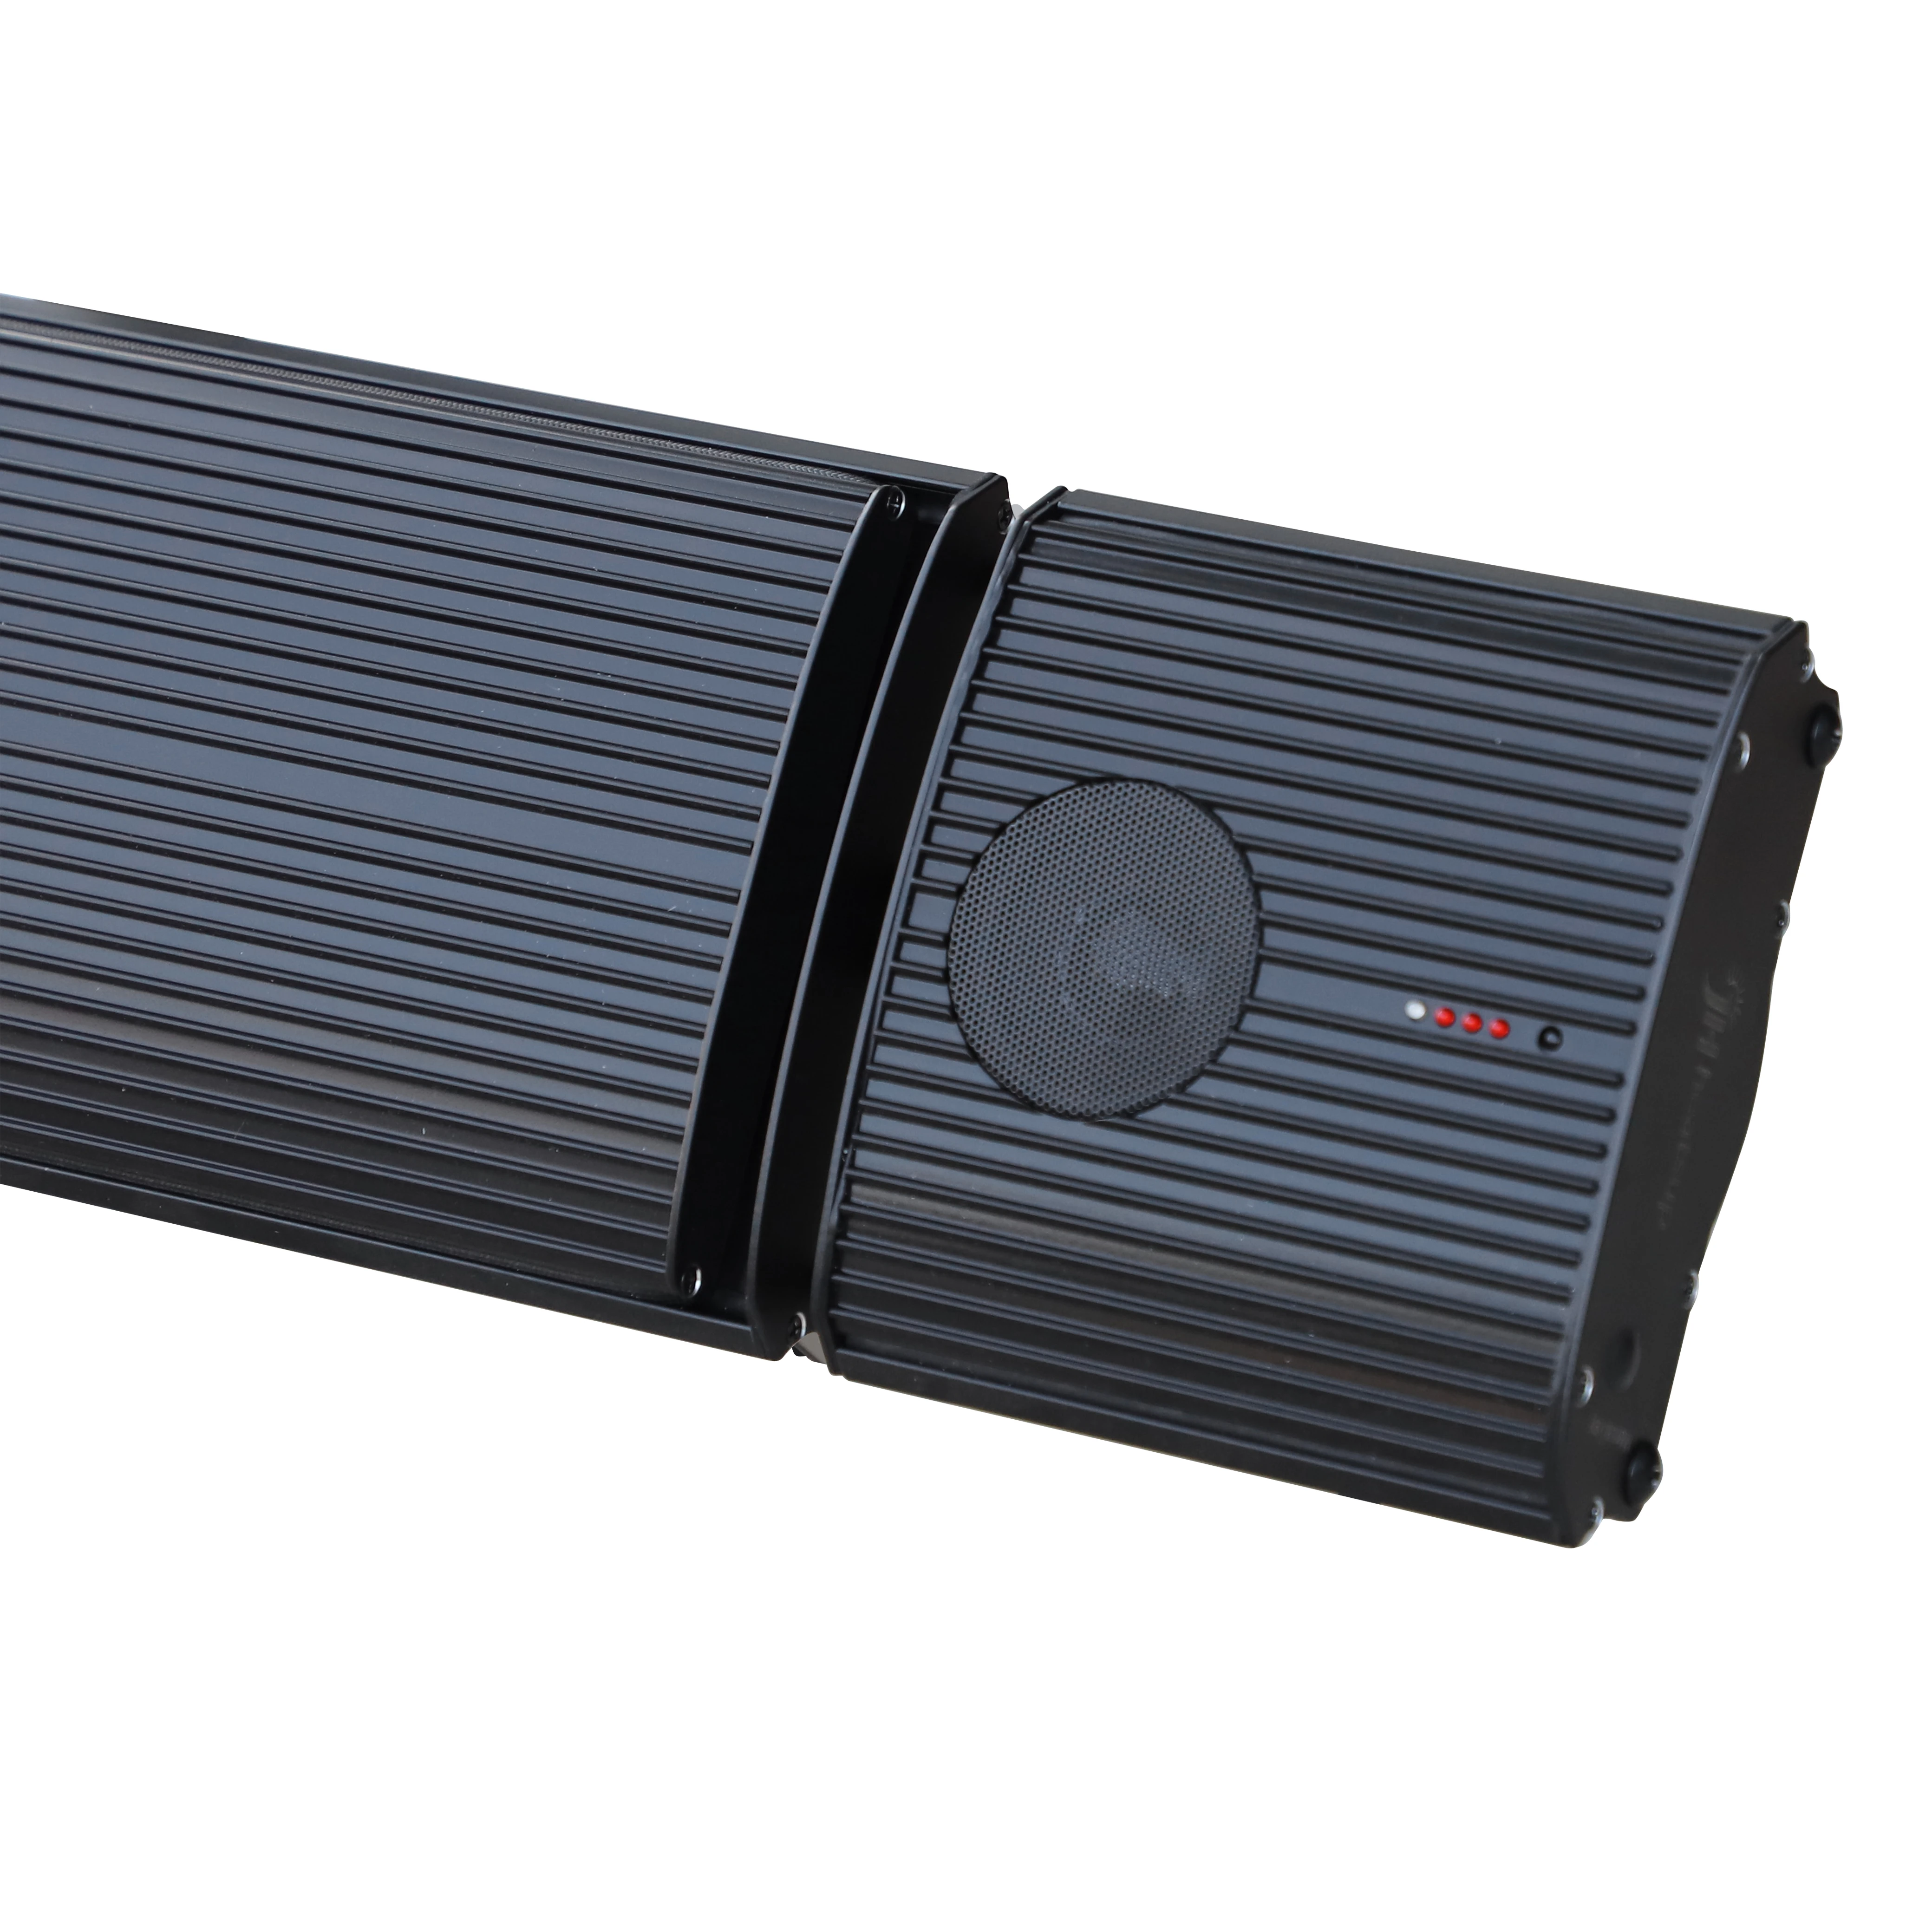
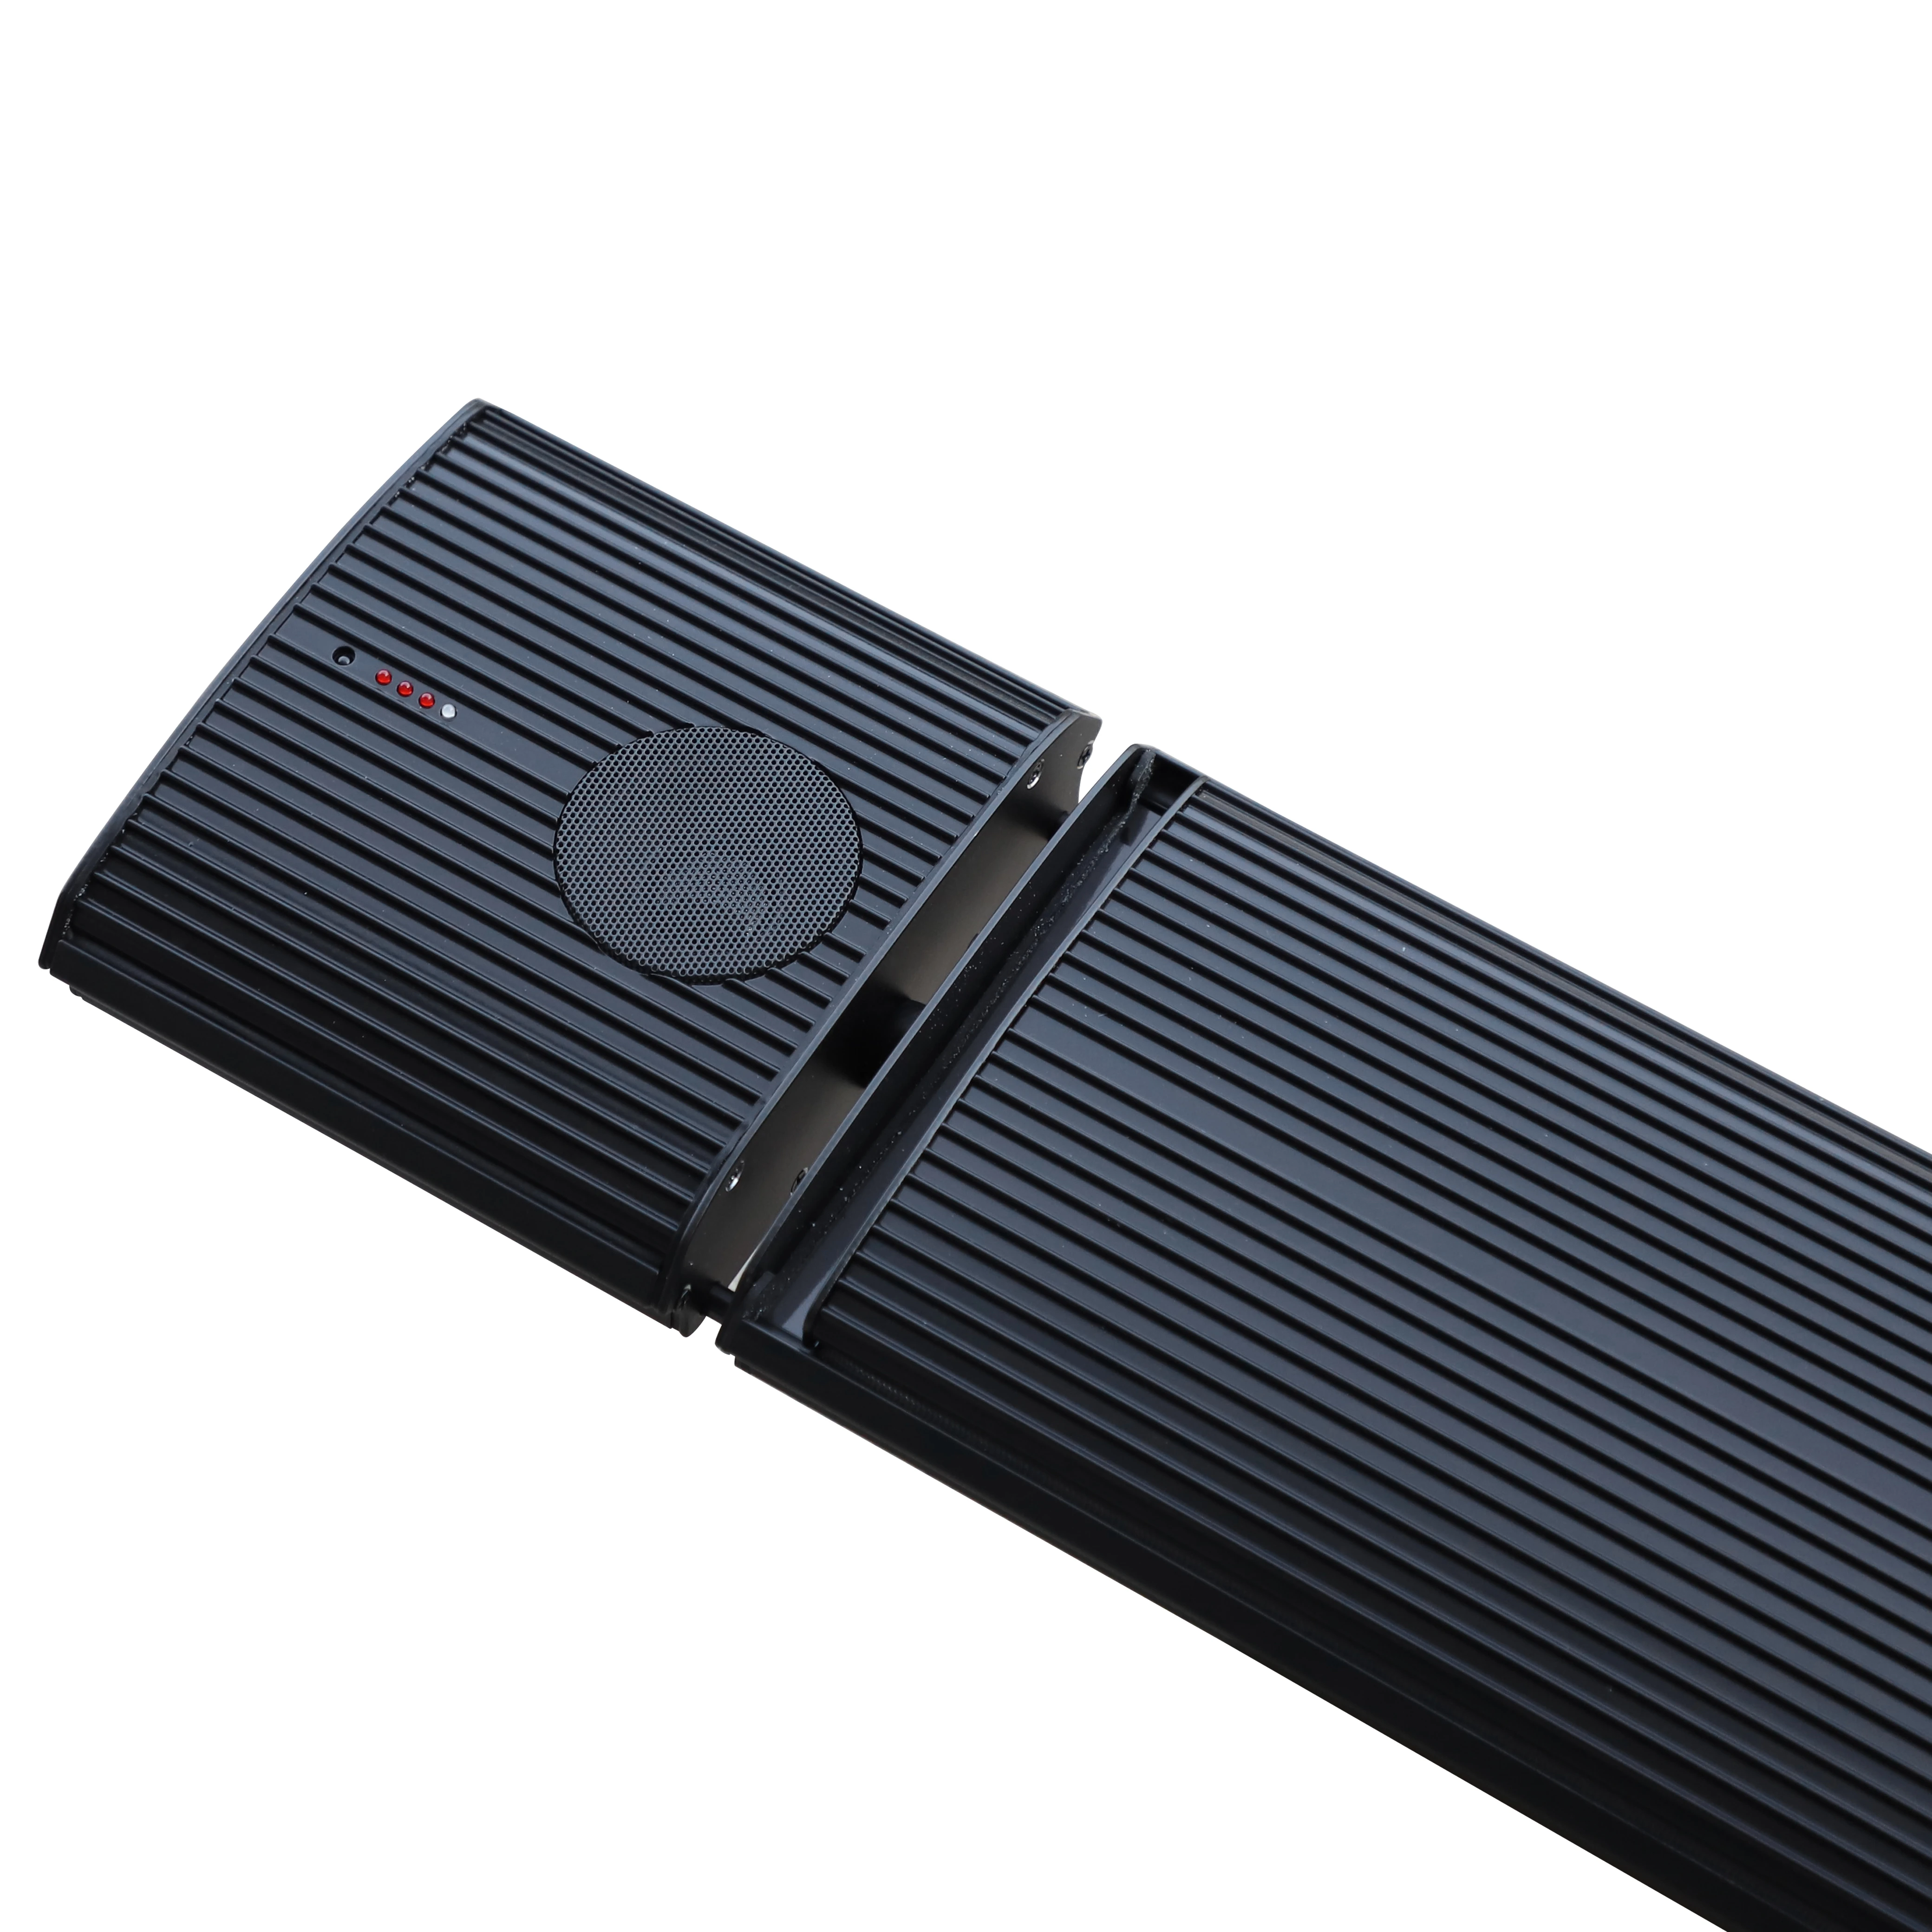
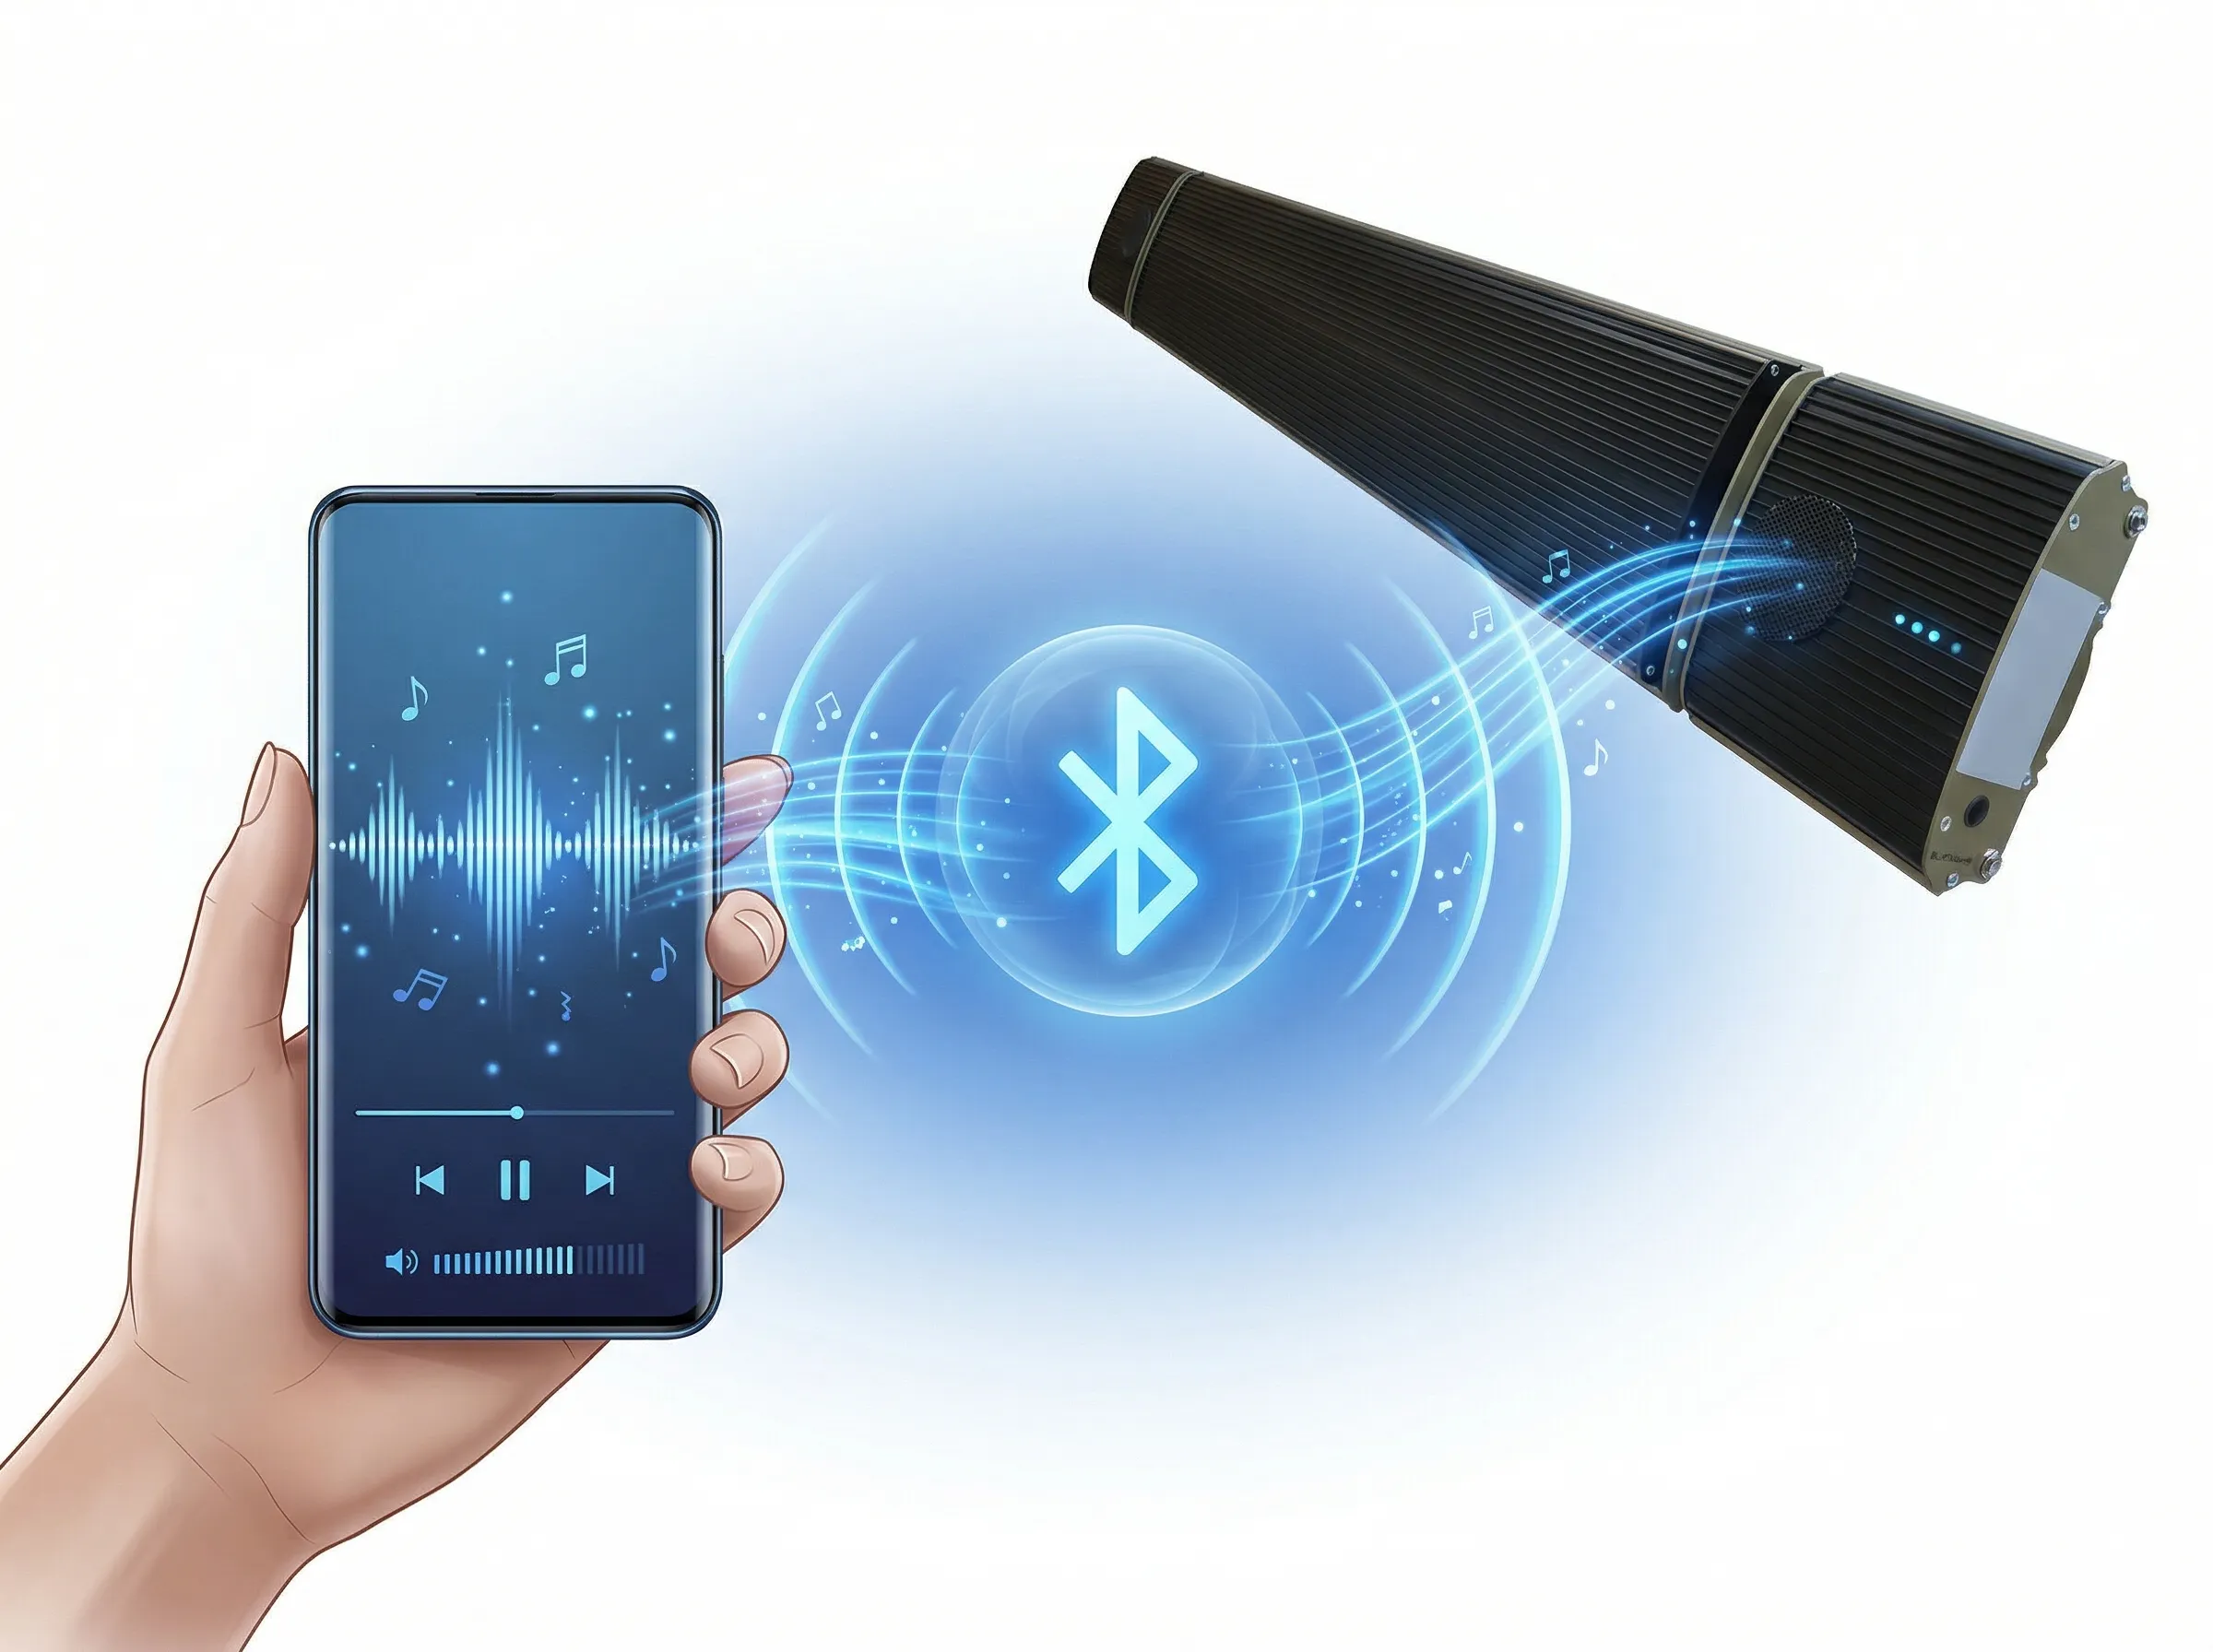
The built-in Bluetooth speaker allows users to connect a mobile phone, laptop, tablet, or other Bluetooth-enabled device for music playback.

3. Working Conditions
Ambient Temperature
−30 °C ~ +30 °C
Rated Voltage
220–240 V~
Rated Frequency
50 Hz / 60 Hz
Relative Humidity
< 95 %
4. Electrical Specifications
Model No. Power (W) Rated Current (A) Voltage (V) Cable Length (mm)
JH-NR10-13C10004.3220–2402000
JH-NR18-13C18007.8220–2402000
JH-NR24-13C240010.4220–2402000
JH-NR32-13C320013.9220–240500
5. Installation Requirements
  • Installation must be carried out by qualified professional installation personnel.
  • The installer should hold a valid electrical installation certificate where required.
  • Supply voltage fluctuation should be within ±10%. If not, correct the power supply before installation.
  • If there is a serious safety risk in the user's electrical environment, installation should be refused until the risk is eliminated.
  • Electrical lines must be equipped with earth leakage protection devices and a master switch.
  • The ground wire must be connected to the building grounding device.
  • Do not connect the ground wire to gas pipes, water pipes, lightning rods, or telephone grounding wires.
  • 6. Installation Dimensions
    Model No. Dimension A Dimension B
    JH-NR10-13C975 mm200 mm
    JH-NR18-13C1375 mm700 mm
    JH-NR24-13C1875 mm1200 mm
    JH-NR32-13C2375 mm1700 mm

    Dimension A refers to the overall installation length. Dimension B refers to the minimum span of expansion screws.

    7. Installation Steps
    1

    Install Adjusting Bracket and Sliding Bracket

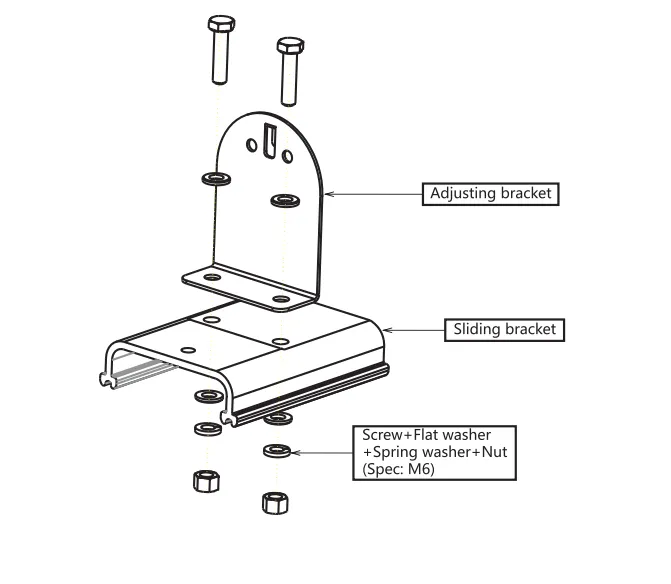
    Connect the adjusting bracket to the sliding bracket using the supplied screw, flat washer, spring washer, and nut.

    Step 1
    2

    Install Sliding Bracket and Heater

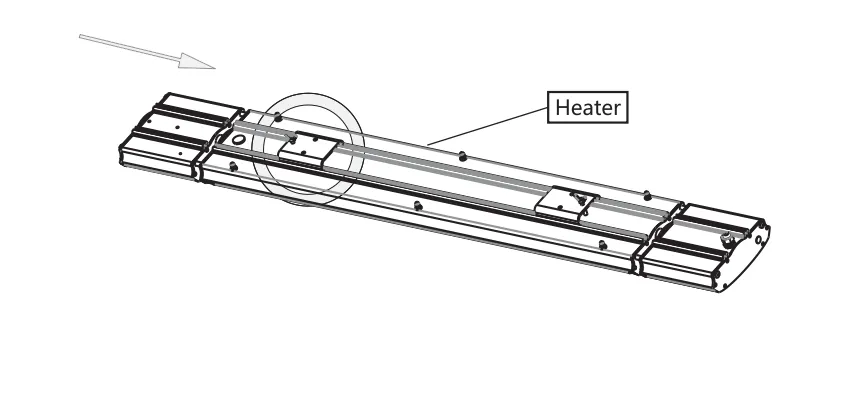
    Install the sliding bracket and heater according to the indicated direction.

    Step 2
    3

    Fix Adjusting Bracket to Wall

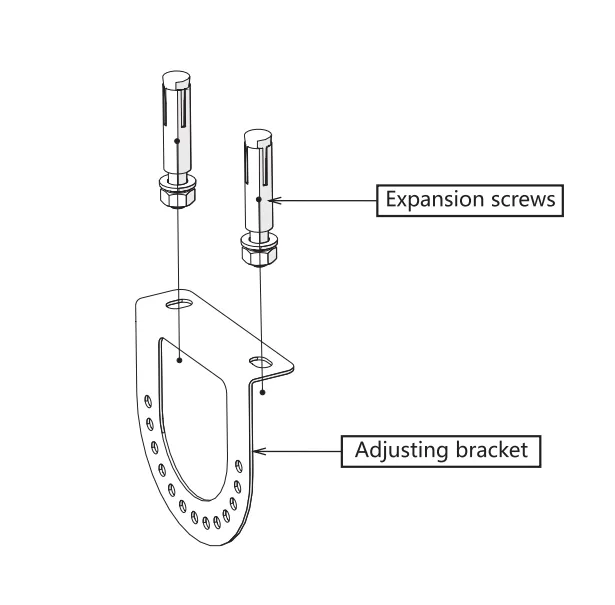
    Fix the adjusting bracket to the wall using expansion screws.

    Step 3
    4

    Secure Both Adjusting Brackets

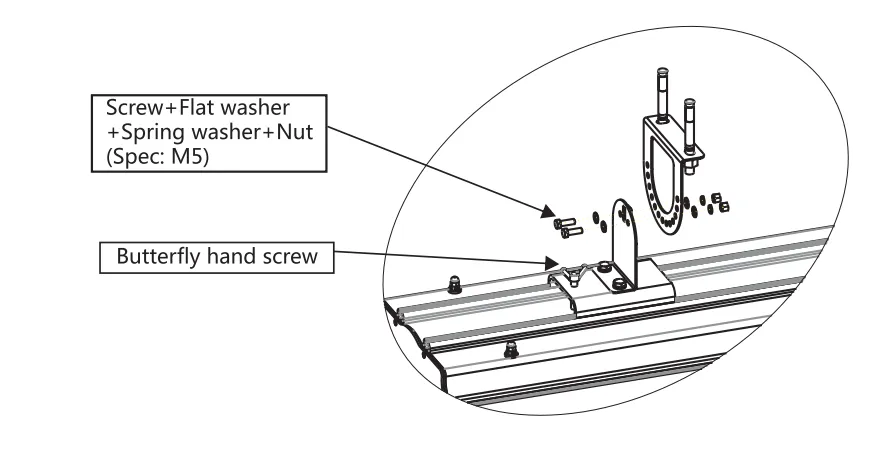
    Install the two adjusting brackets and tighten the lock brackets using butterfly hand screws.

    Step 4
    8. Installation Diagram
    Vertical Installation Ceiling Installation

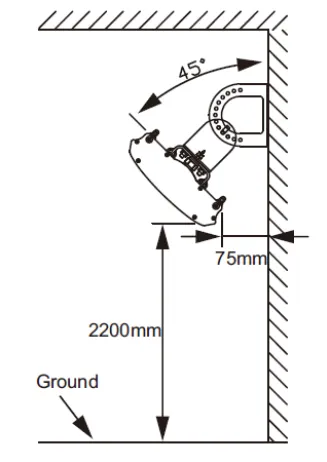
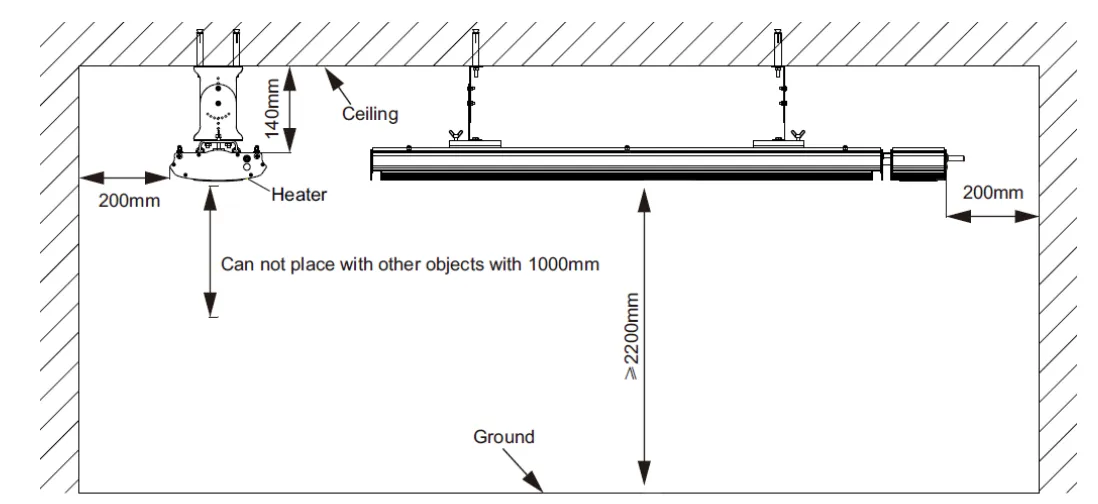
    The heater may be installed vertically in front of a wall or suspended from the ceiling. Keep the required safety clearance around the heater. Do not place objects within 1000 mm directly in front of the heater.

    • Installation height from ground: 2200 mm
    • Suggested angle: 45°
    • Clearance behind heater: 150 mm
    • Side clearance: 200 mm
    • Keep at least 1000 mm clearance from objects directly in front of the heater.
    9. Wiring Diagram
    FOR QUALIFIED ELECTRICIANS ONLY

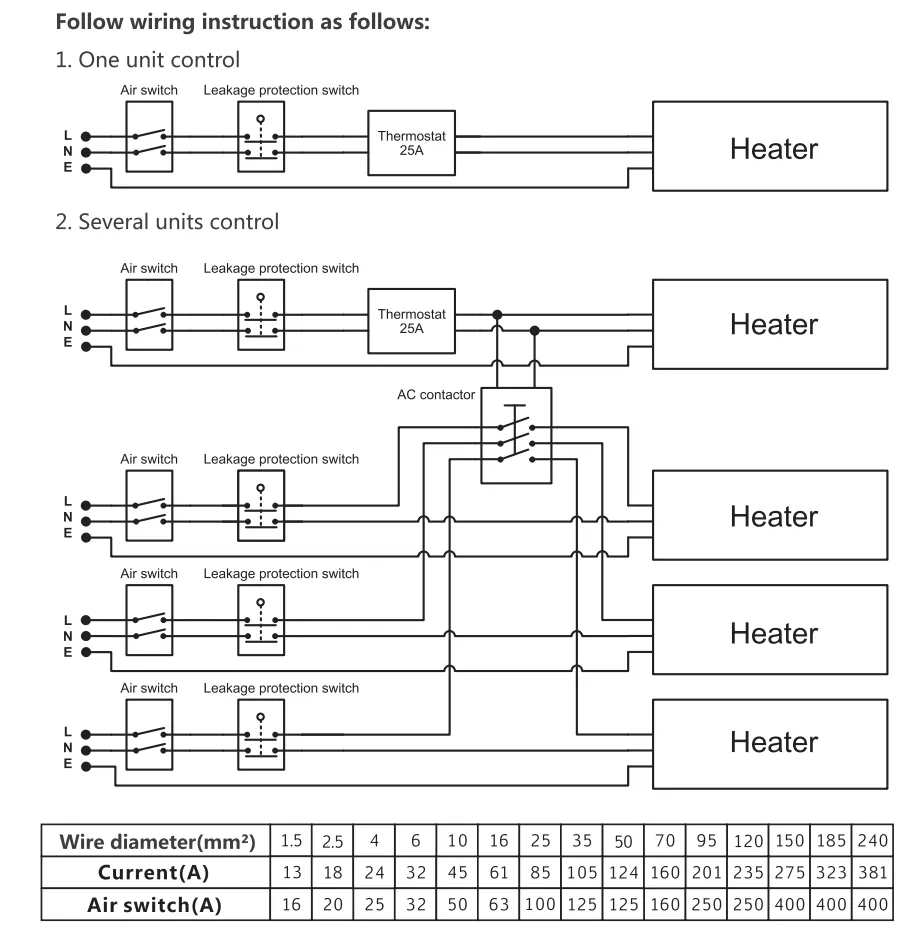
    Wiring must be performed by qualified electrical personnel only. The power line must include leakage protection and a master switch. For multiple heater control, use a suitable AC contactor and protection device according to local electrical standards.

    Internal Wire Diagram Wiring Diagram
    10. Remote Controller
    Remote Controller

    ON/OFF Button

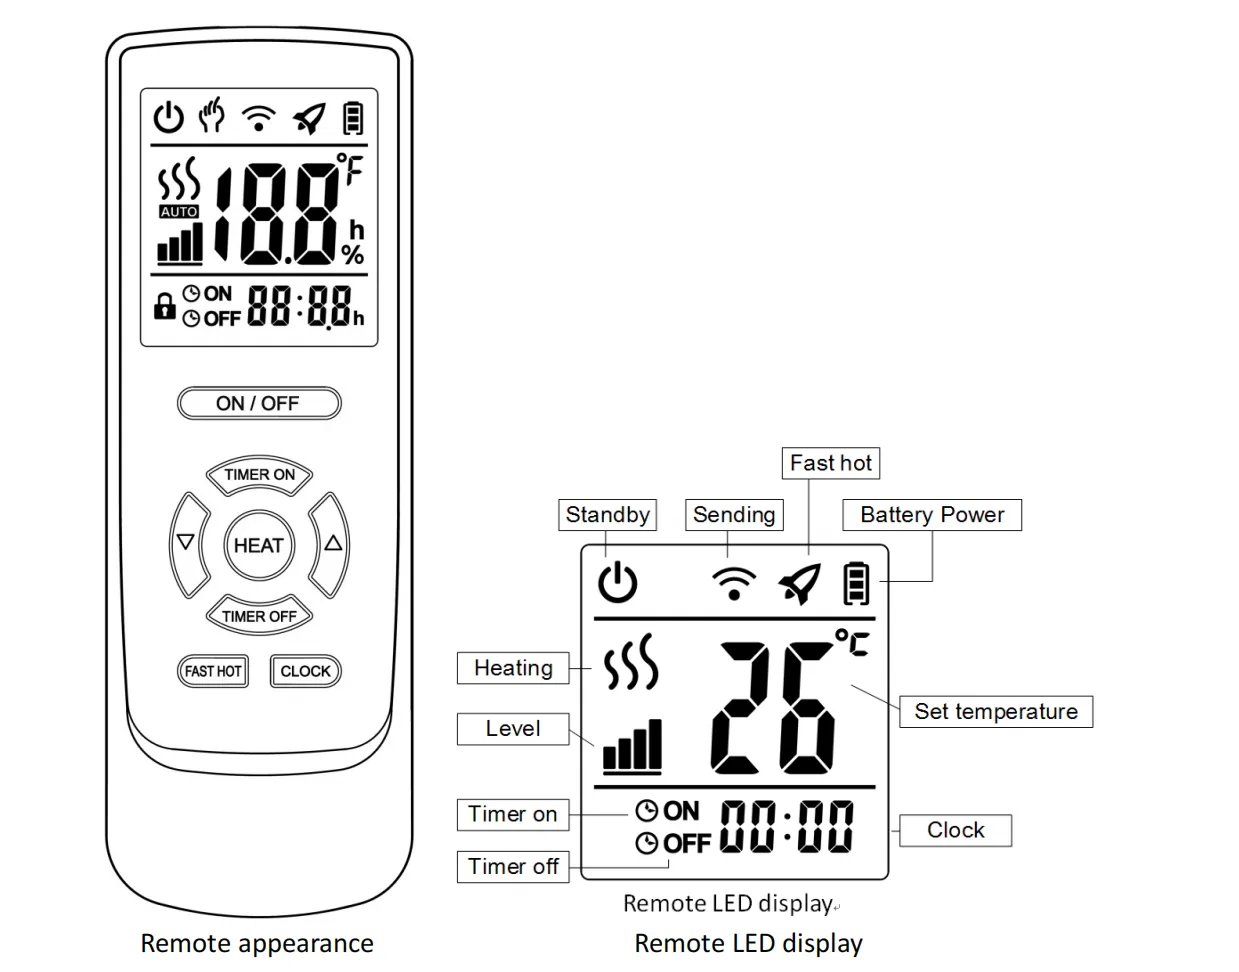
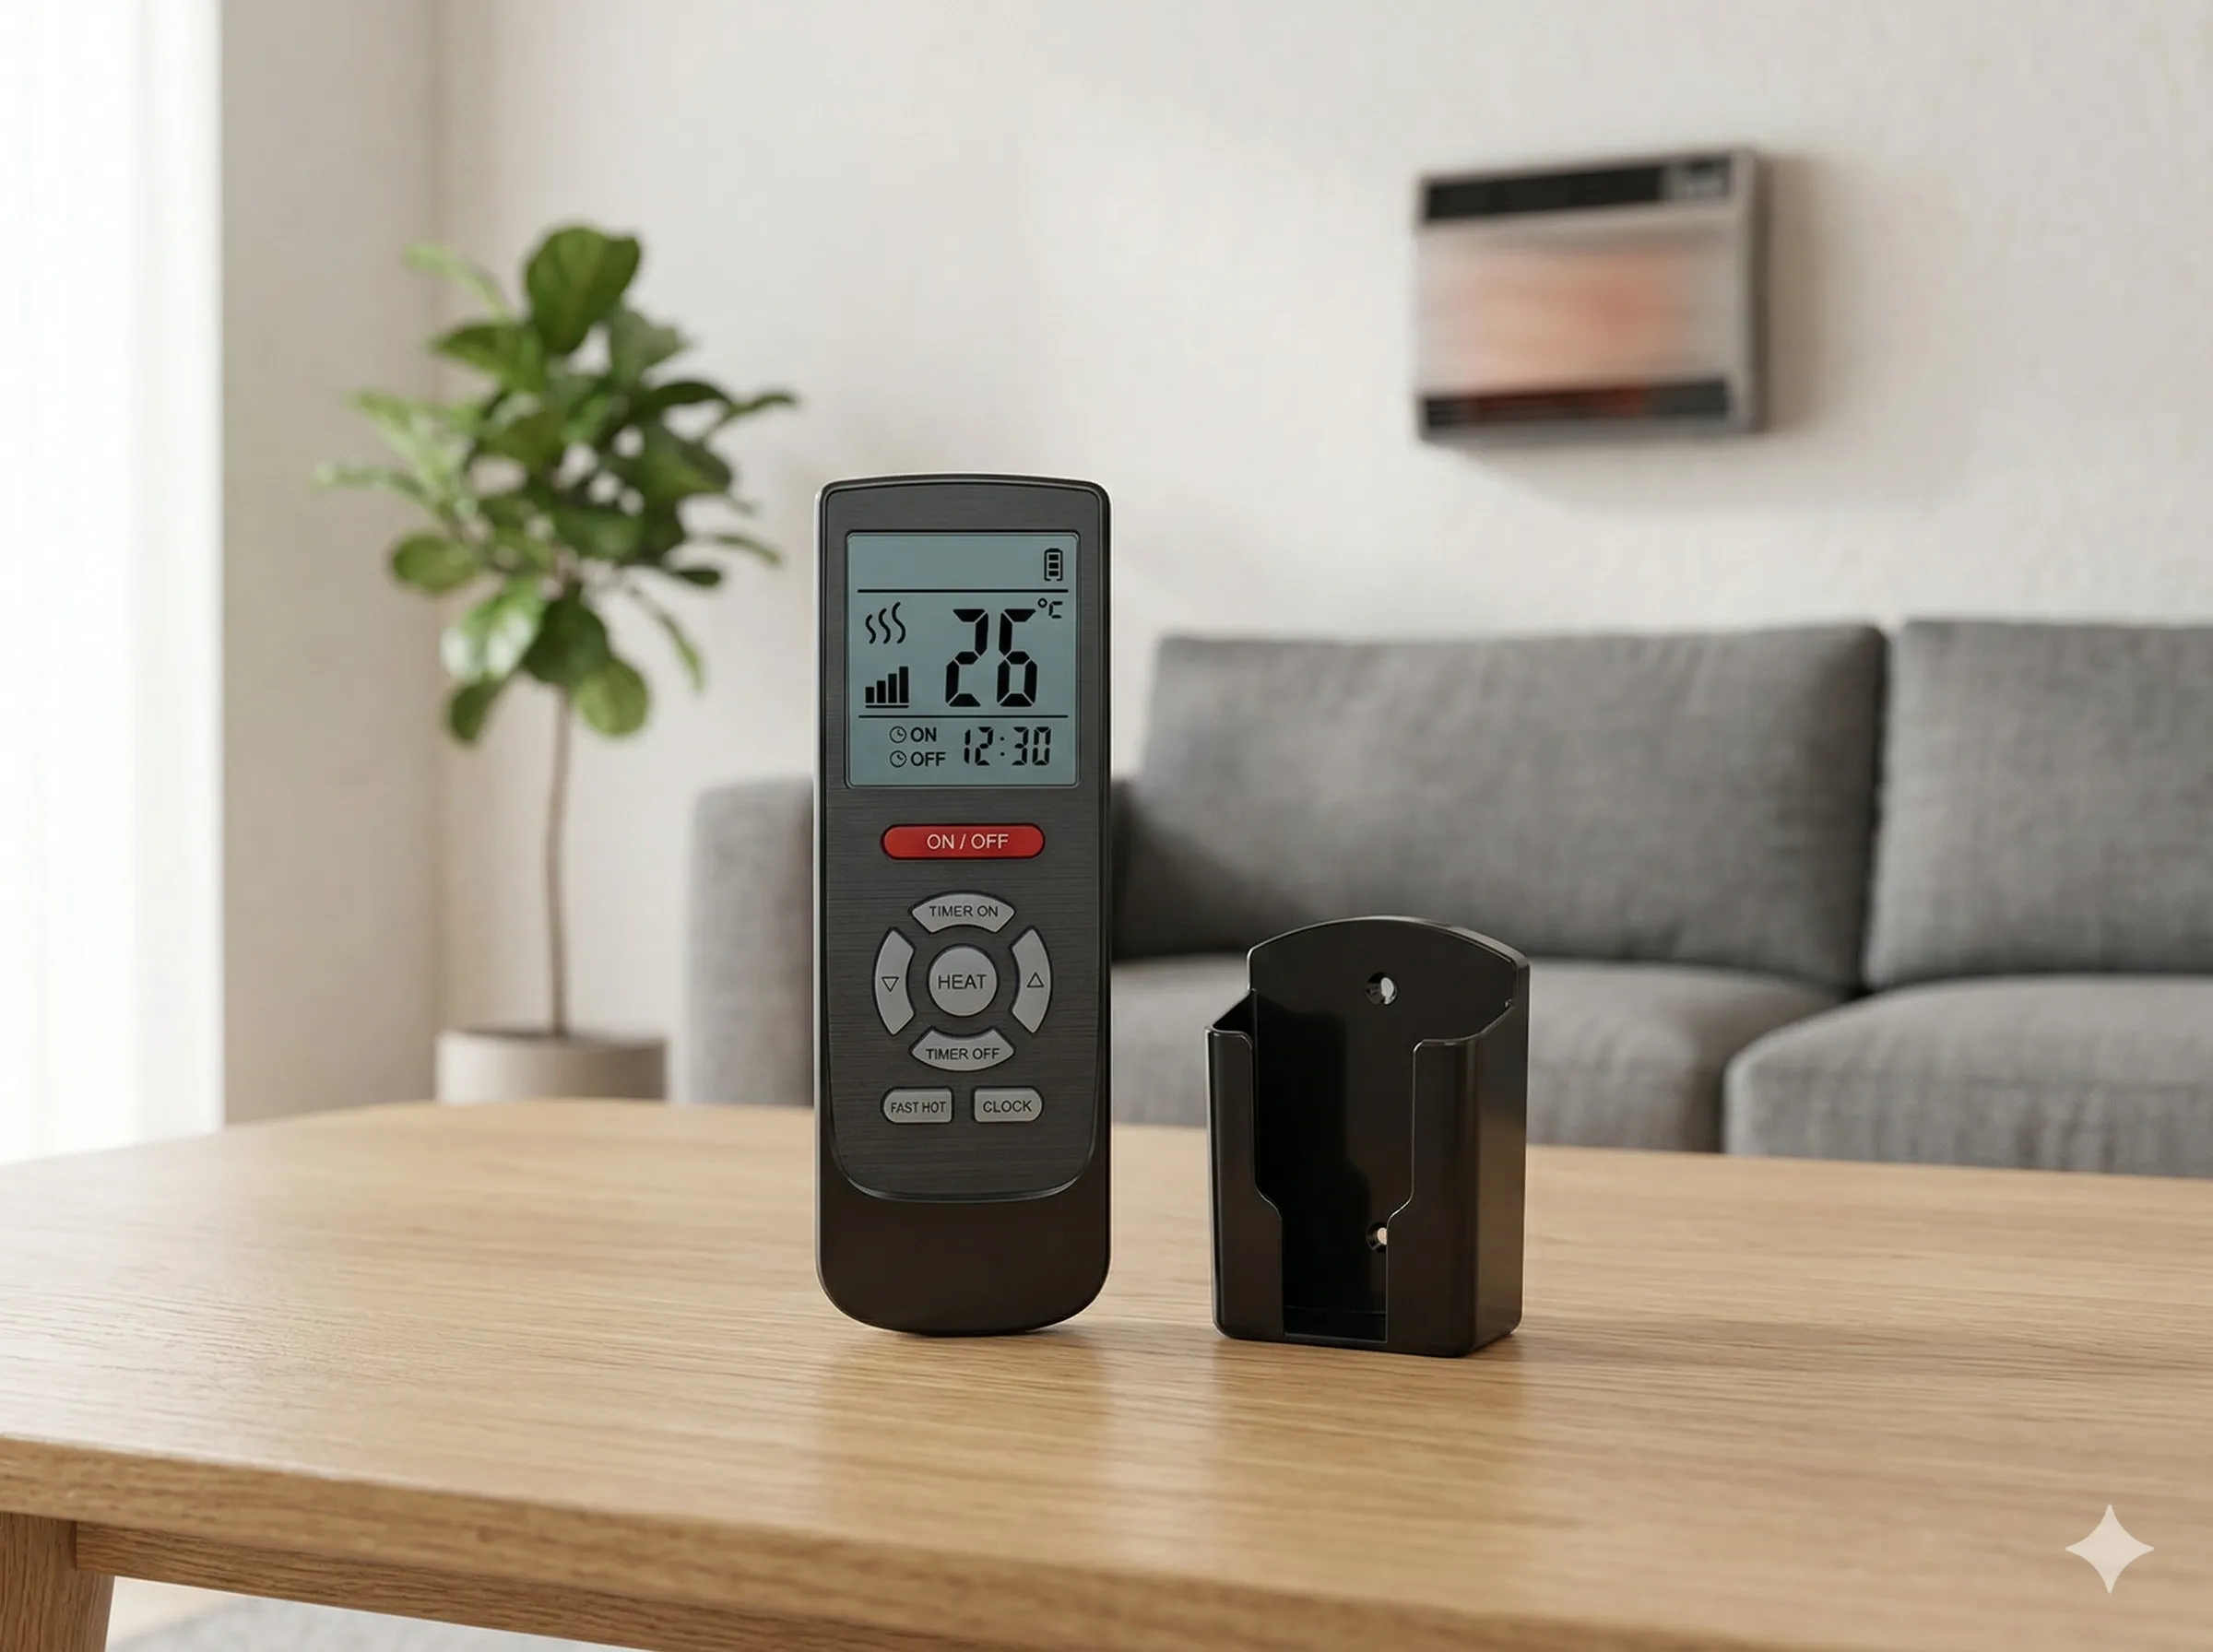
    Press the ON/OFF button to turn the heater on or off.

    Clock Button

    Press Clock to enter time setting. Use the up/down buttons to adjust hour, minute, and second. Press Clock again to confirm.

    Level Button

    Press Level when the heater is on to adjust the power level.

    Fast Hot Button

    Press Fast Hot to run the heater at full power for rapid heating.

    Timer ON Button

    Press Timer ON to set the automatic start time. Use the up/down buttons to adjust hour and minute. Press Timer ON again to confirm.

    Timer OFF Button

    Press Timer OFF to set the automatic stop time. Use the up/down buttons to adjust hour and minute. Press Timer OFF again to confirm.

    11. LED Indicator & Power Levels

    There are four indicator lights on the temperature controller. Indicator No. 1 has two colors: red and green. After the heater is connected to power, the indicator lights remain off. Press ON/OFF to turn on the heater. The default power setting is 100%.

    Power Levels

    25%
    Power Level 1
    50%
    Power Level 2
    75%
    Power Level 3
    100%
    Power Level 4

    Timer Settings

    No Timer
    Clock function inactive
    2H
    Auto close after 2 hours
    4H
    Auto close after 4 hours
    8H
    Auto close after 8 hours
    12. Bluetooth Speaker
    Bluetooth Speaker

    The Bluetooth speaker turns on automatically when the heater is powered on and enters pairing mode. Search for the Bluetooth device named "JH-HEATER-SPEAKER" on a mobile phone, laptop, tablet, or other Bluetooth-enabled device. After pairing, the speaker can be used for music playback.

    Bluetooth Status Indicator

    Green light flashing: Bluetooth speaker is connected.
    Red-green light flashing: Bluetooth speaker is waiting for connection.

    Bluetooth Reset Button

    Long press this button to disconnect the Bluetooth speaker.

    📌 Notes
    • The speaker does not support phone hands-free calling.
    • Due to possible 2.4G radio interference, if the speaker cannot pair or play music normally, turn off the heater and power it on again.
    13. Inspection After Installation
    Items to be checked Risk caused by improper installation
    Is the installation stable? The equipment may fall off or shake.
    Is heat insulation adequate? Objects close to the heater may be damaged.
    Does the power voltage match the product nameplate? Equipment failure may occur.
    Are the wire connections correct? Equipment failure may occur.
    Is the ground wire connected safely? Electric leakage risk may occur.
    Does the wiring conform to standard? Equipment failure or circuit damage may occur.
    14. Commissioning Checklist
  • Do not connect power before installation is complete.
  • Confirm all wire connections are correct and firm.
  • Remove all scattered objects from the radiant heater body.
  • Connect power and observe whether the radiant heater operates correctly.
  • 15. Safety Precautions
    ⚠️ WARNING — READ CAREFULLY
    1. 1This appliance is not intended for use by persons, including children, with reduced physical, sensory, or mental capabilities, or lack of experience and knowledge, unless they have been supervised or instructed by a responsible person.
    2. 2Children should be supervised to ensure they do not play with the appliance.
    3. 3Do not cover the heater to avoid overheating.
    4. 4If the supply cord is damaged, it must be replaced by the manufacturer, service agent, or similarly qualified person.
    5. 5The heater must not be located immediately below a socket outlet.
    6. 6Do not use the same socket with other appliances to avoid current overload.
    7. 7Disconnect the power before maintenance or when the heater is not in use.
    8. 8Do not pull the power cord by hand when unplugging.
    9. 9If the heater or wire is damaged, stop using it immediately and contact authorized service personnel. Do not repair it yourself.
    10. 10The heater must be installed at least 2.2 meters above ground level.
    11. 11The radiant heater surface becomes very hot during operation and must not be touched.
    12. 12Do not cover the radiant panel or hang objects from the heater.
    13. 13Keep at least 150 mm clearance behind the heater and from the ceiling, at least 200 mm from the sides, and at least 1000 mm directly in front of the heater.
    14. 14Before cleaning, disconnect the power and allow the heater surface to cool. Do not rinse with water or immerse in liquid.
    15. 15Do not install or use the heater in areas with flammable, explosive, or easily ignited materials.
    16. 16Do not insert metal or foreign objects into the heater.
    17. 17Do not touch the high-temperature radiant panel to avoid burns or accidental injury.
    16. Packing List
    17. Product Specifications
    Model No. Dimension (mm) Package Size (mm) Net Weight (kg) Gross Weight (kg)
    JH-NR10-13C975 × 189 × 671070 × 250 × 1457.28.8
    JH-NR18-13C1375 × 189 × 671470 × 250 × 1459.711.3
    JH-NR24-13C1875 × 189 × 671970 × 250 × 14512.314.5
    JH-NR32-13C2375 × 189 × 672470 × 250 × 14515.117.5
    Specification 1 Specification 2 Specification 3 Specification 4
    18. Bluetooth Speaker Technical Parameters
    Technical Parameter Value
    Frequency80 Hz – 18 kHz
    SNR> 90 dB
    Sensitivity80 dB
    THD0.10%
    Bluetooth StandardV4.1, EDR, A2DP
    Speaker4 Ω 5 W × 2
    Working Range< 10 m
    Output Power10 W
    19. Attention

    Due to thermal expansion and contraction, the heater may make slight noise when turning on or off. This is a normal phenomenon and does not affect operation.