Product Gallery
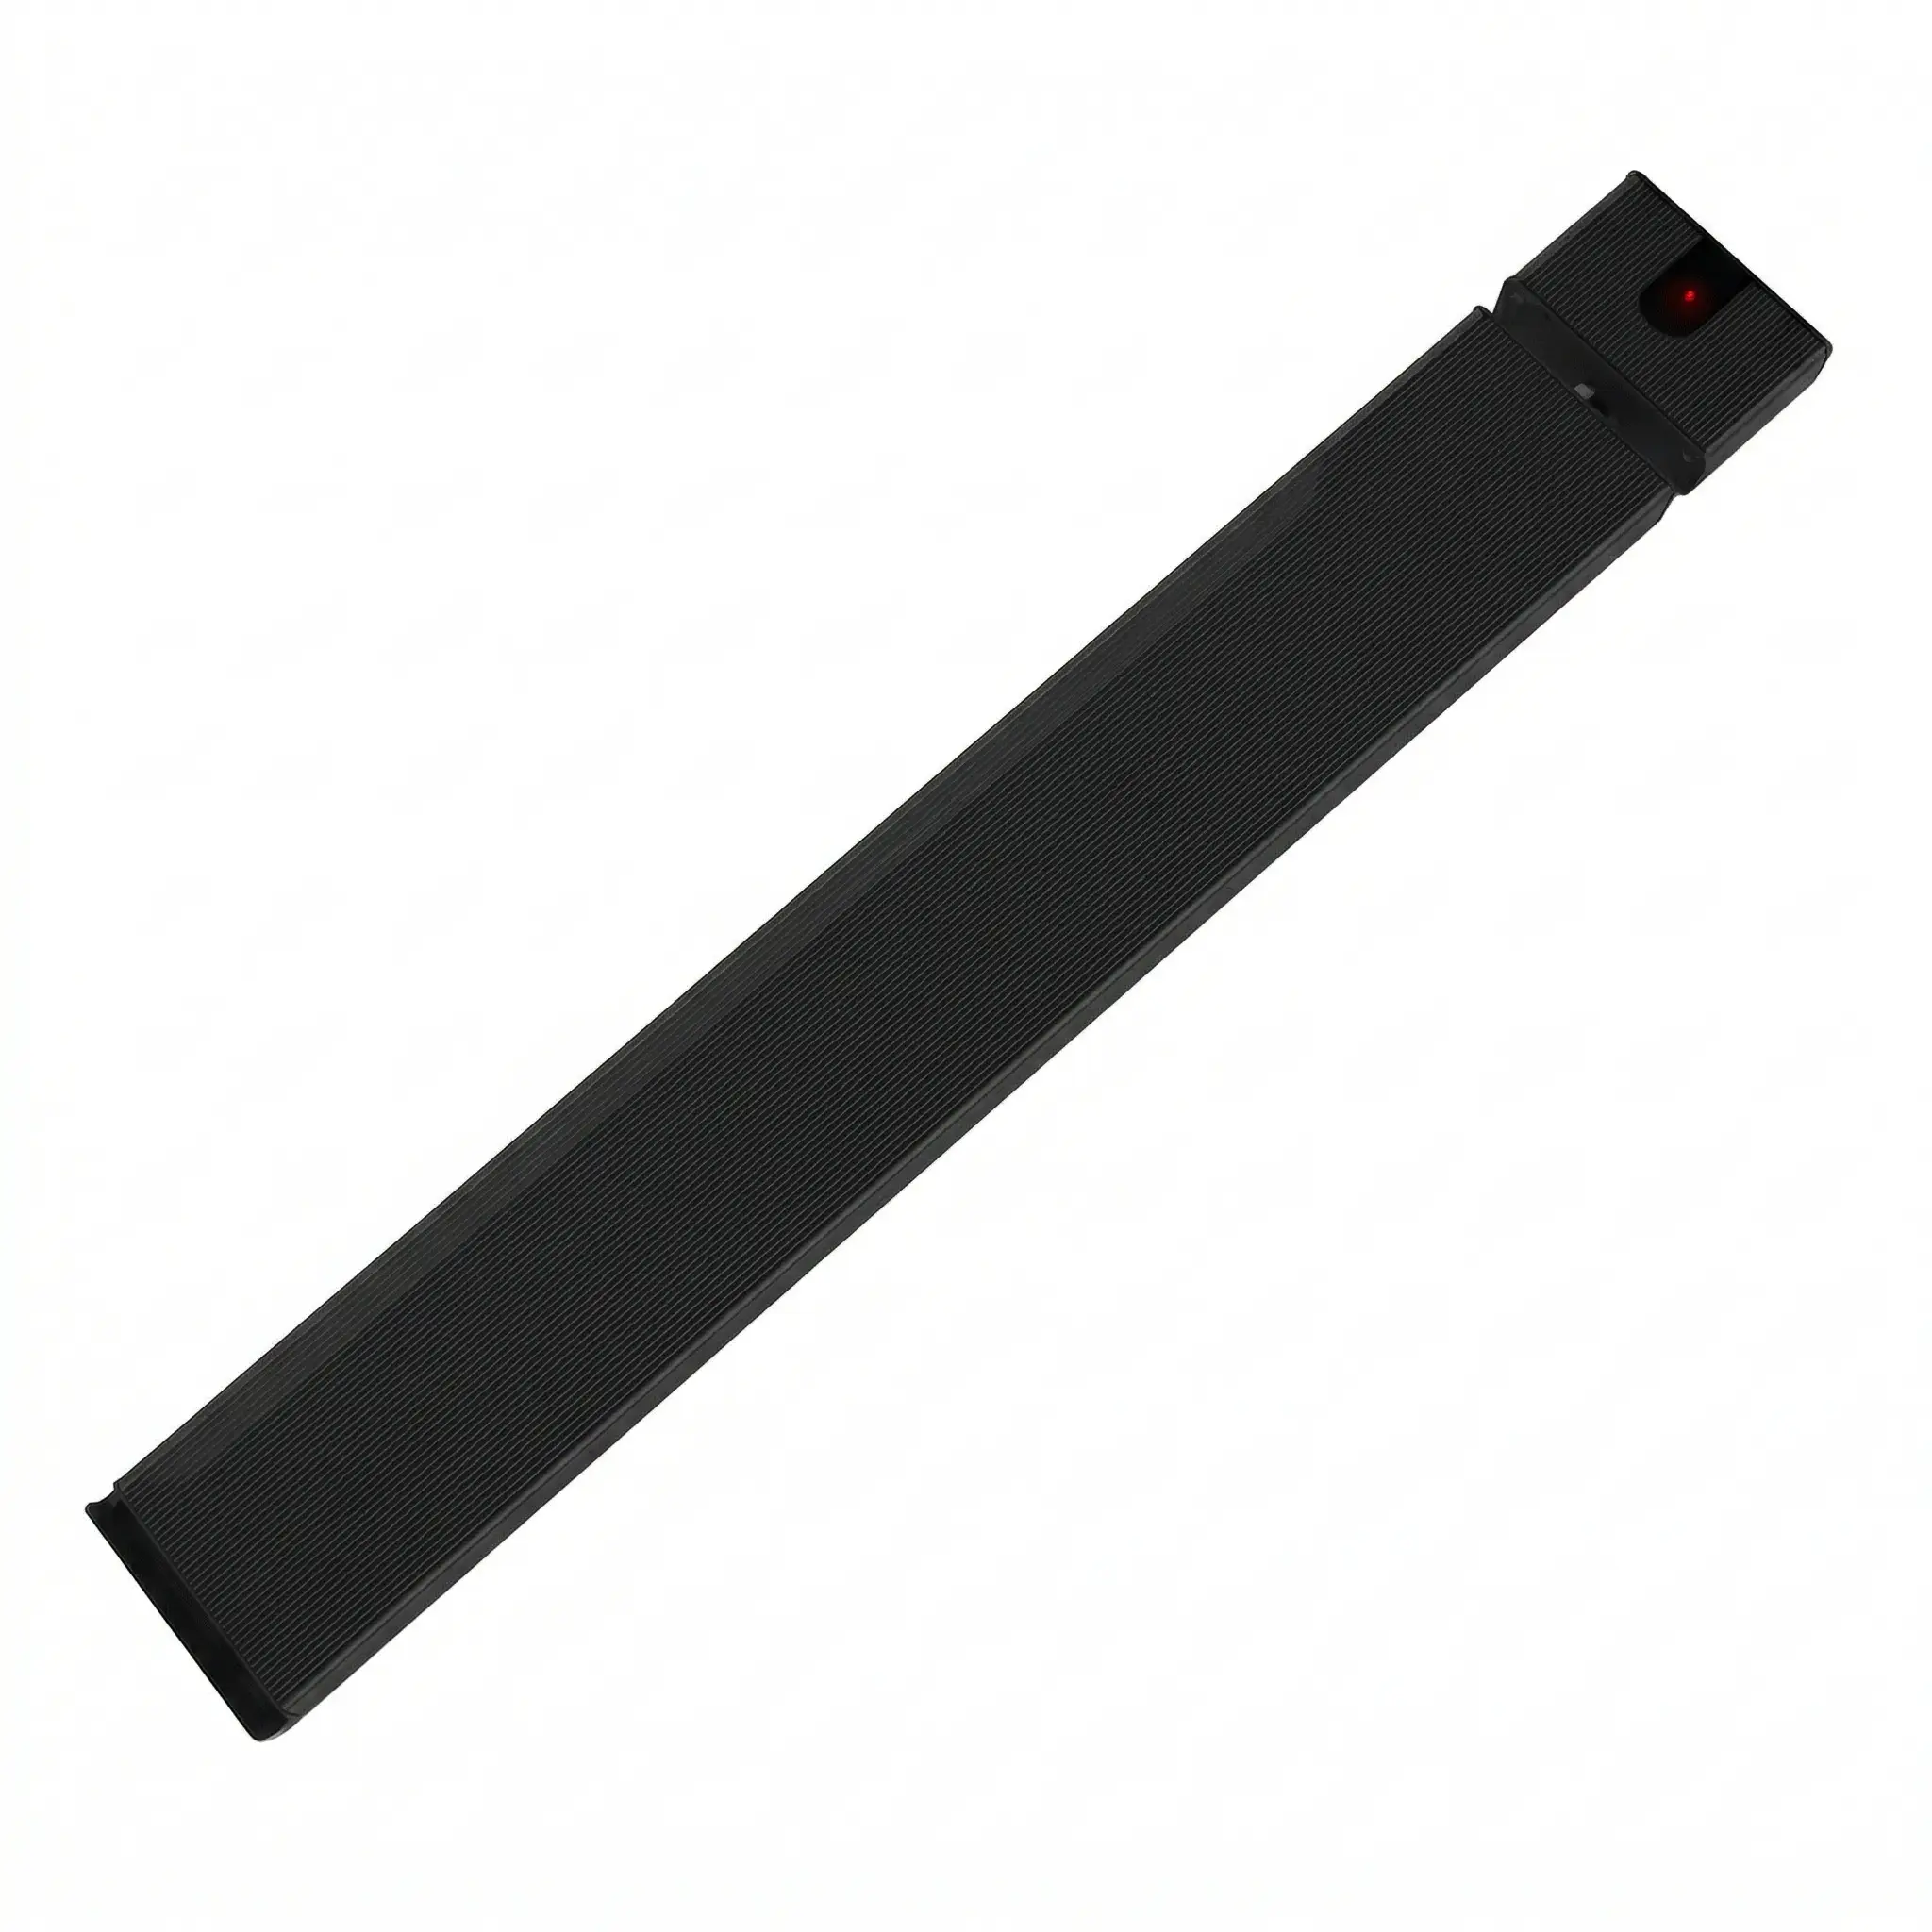
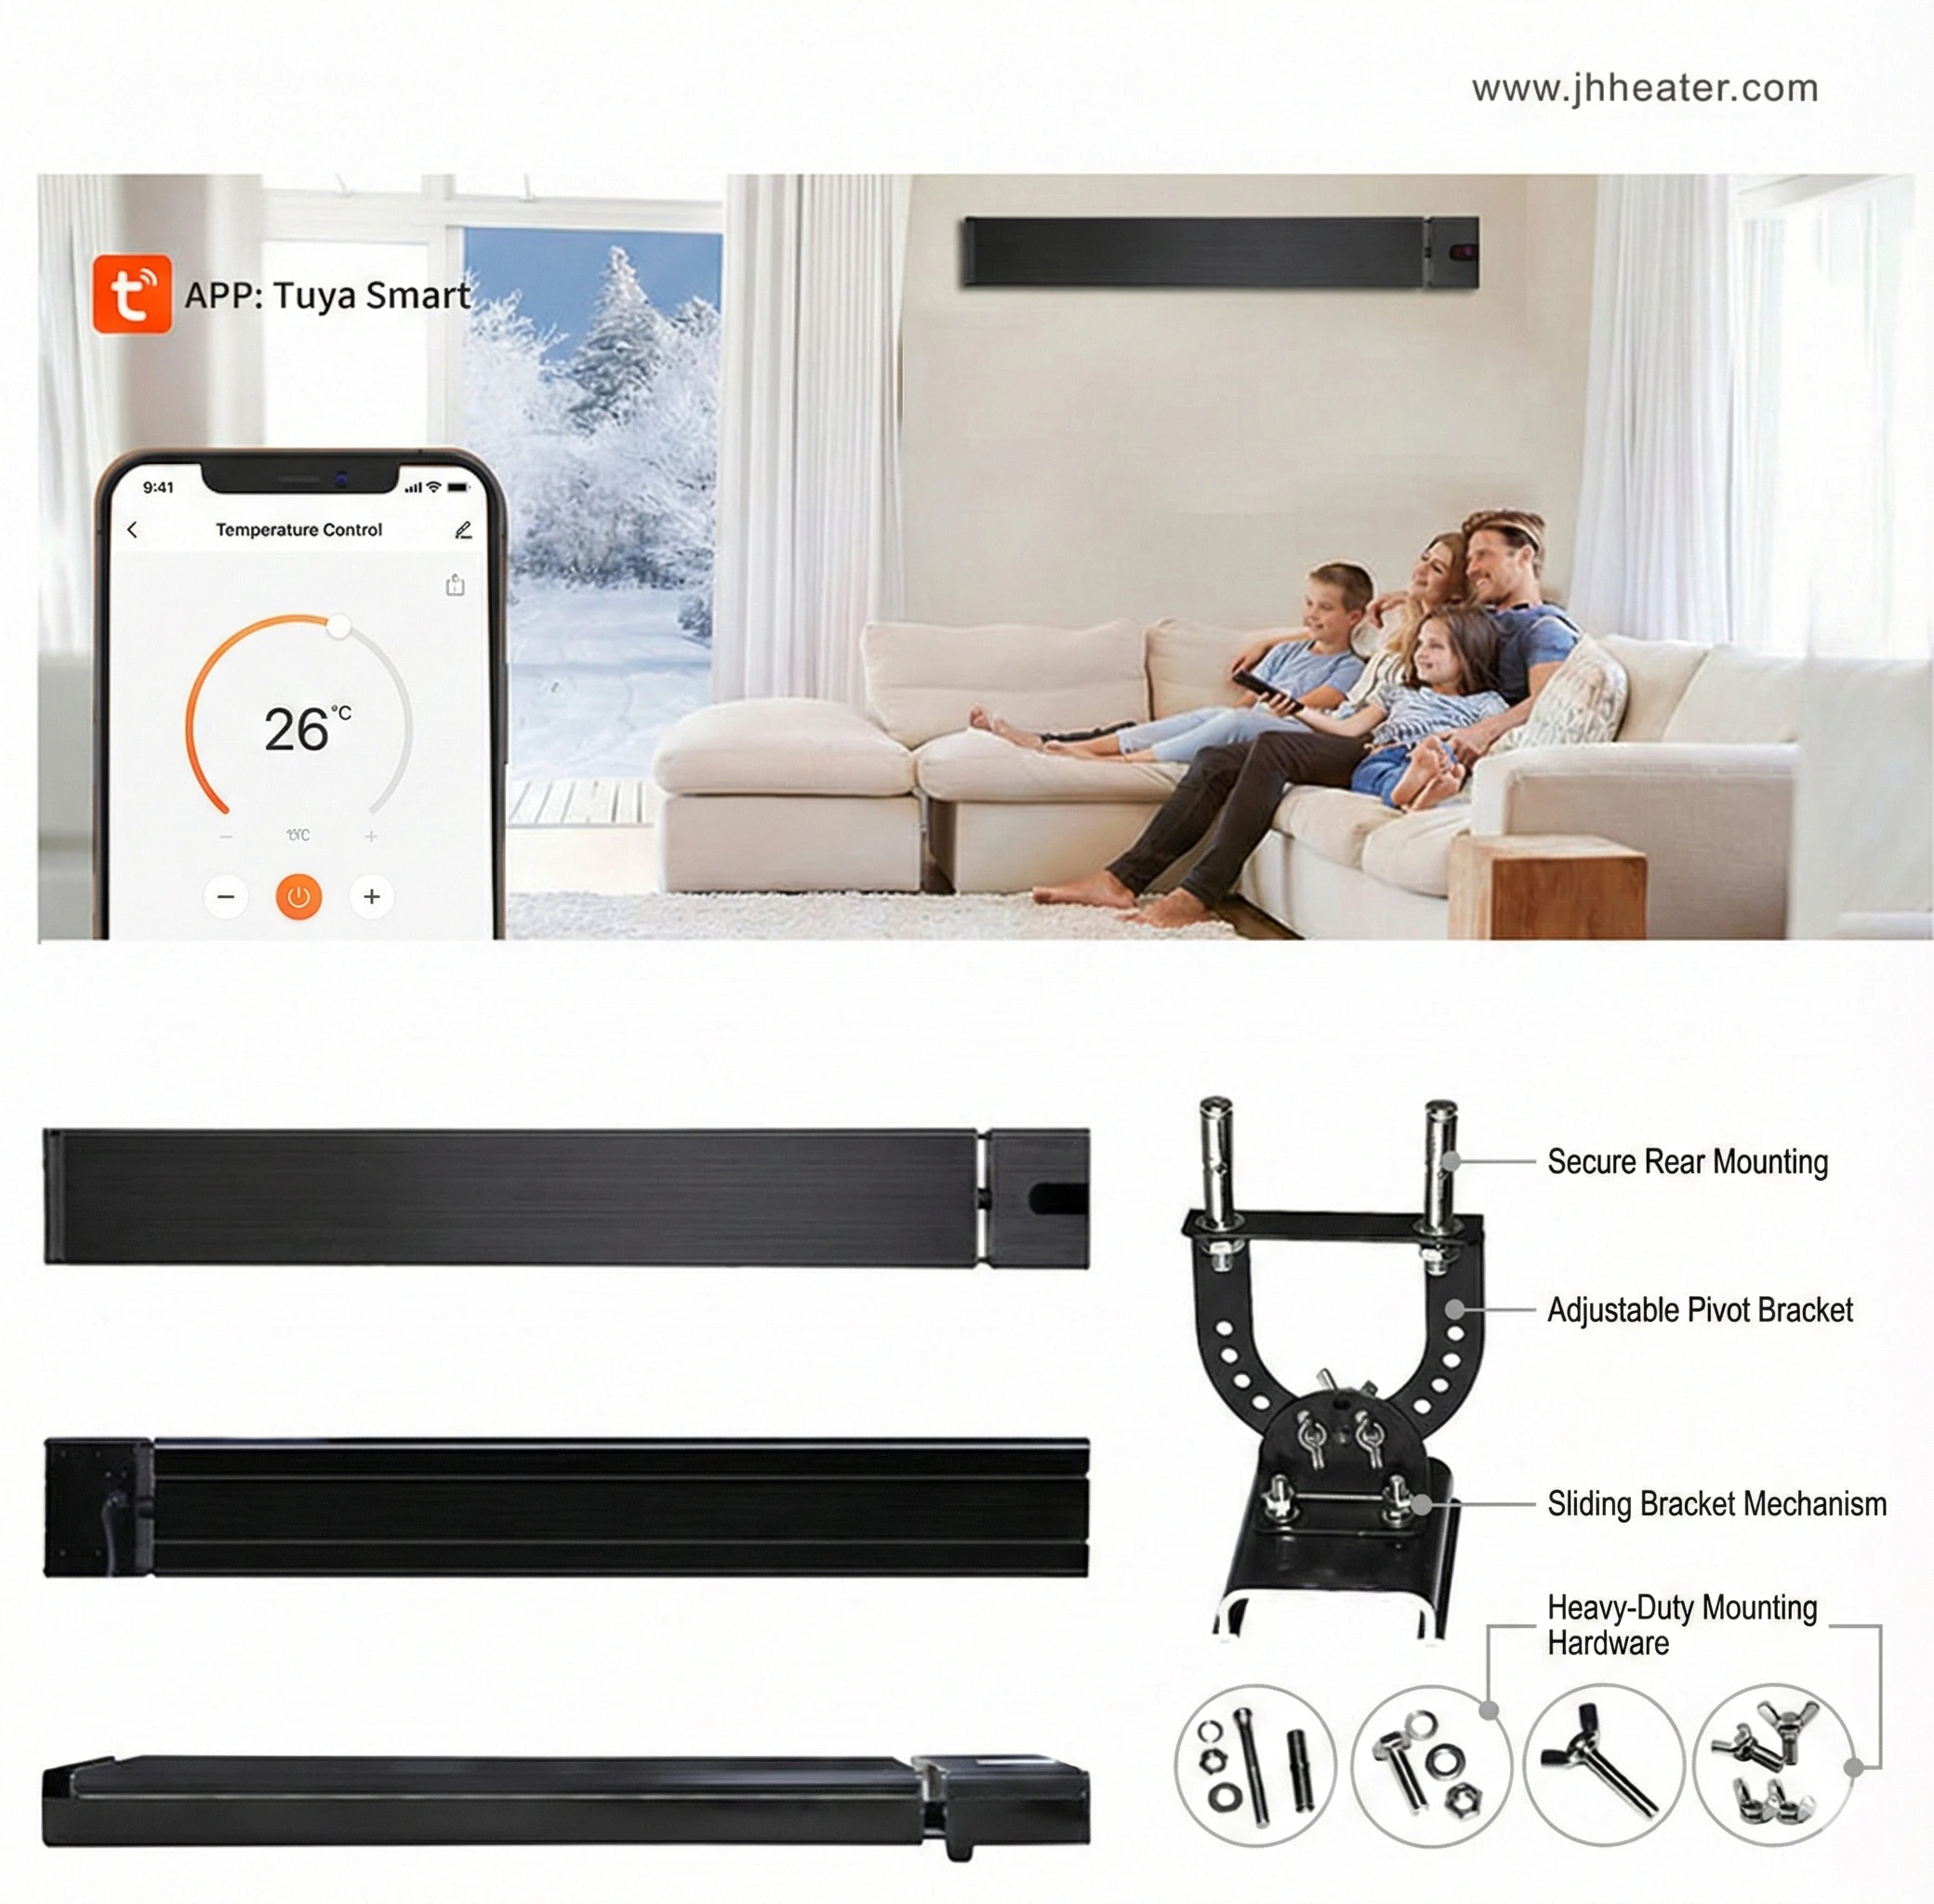
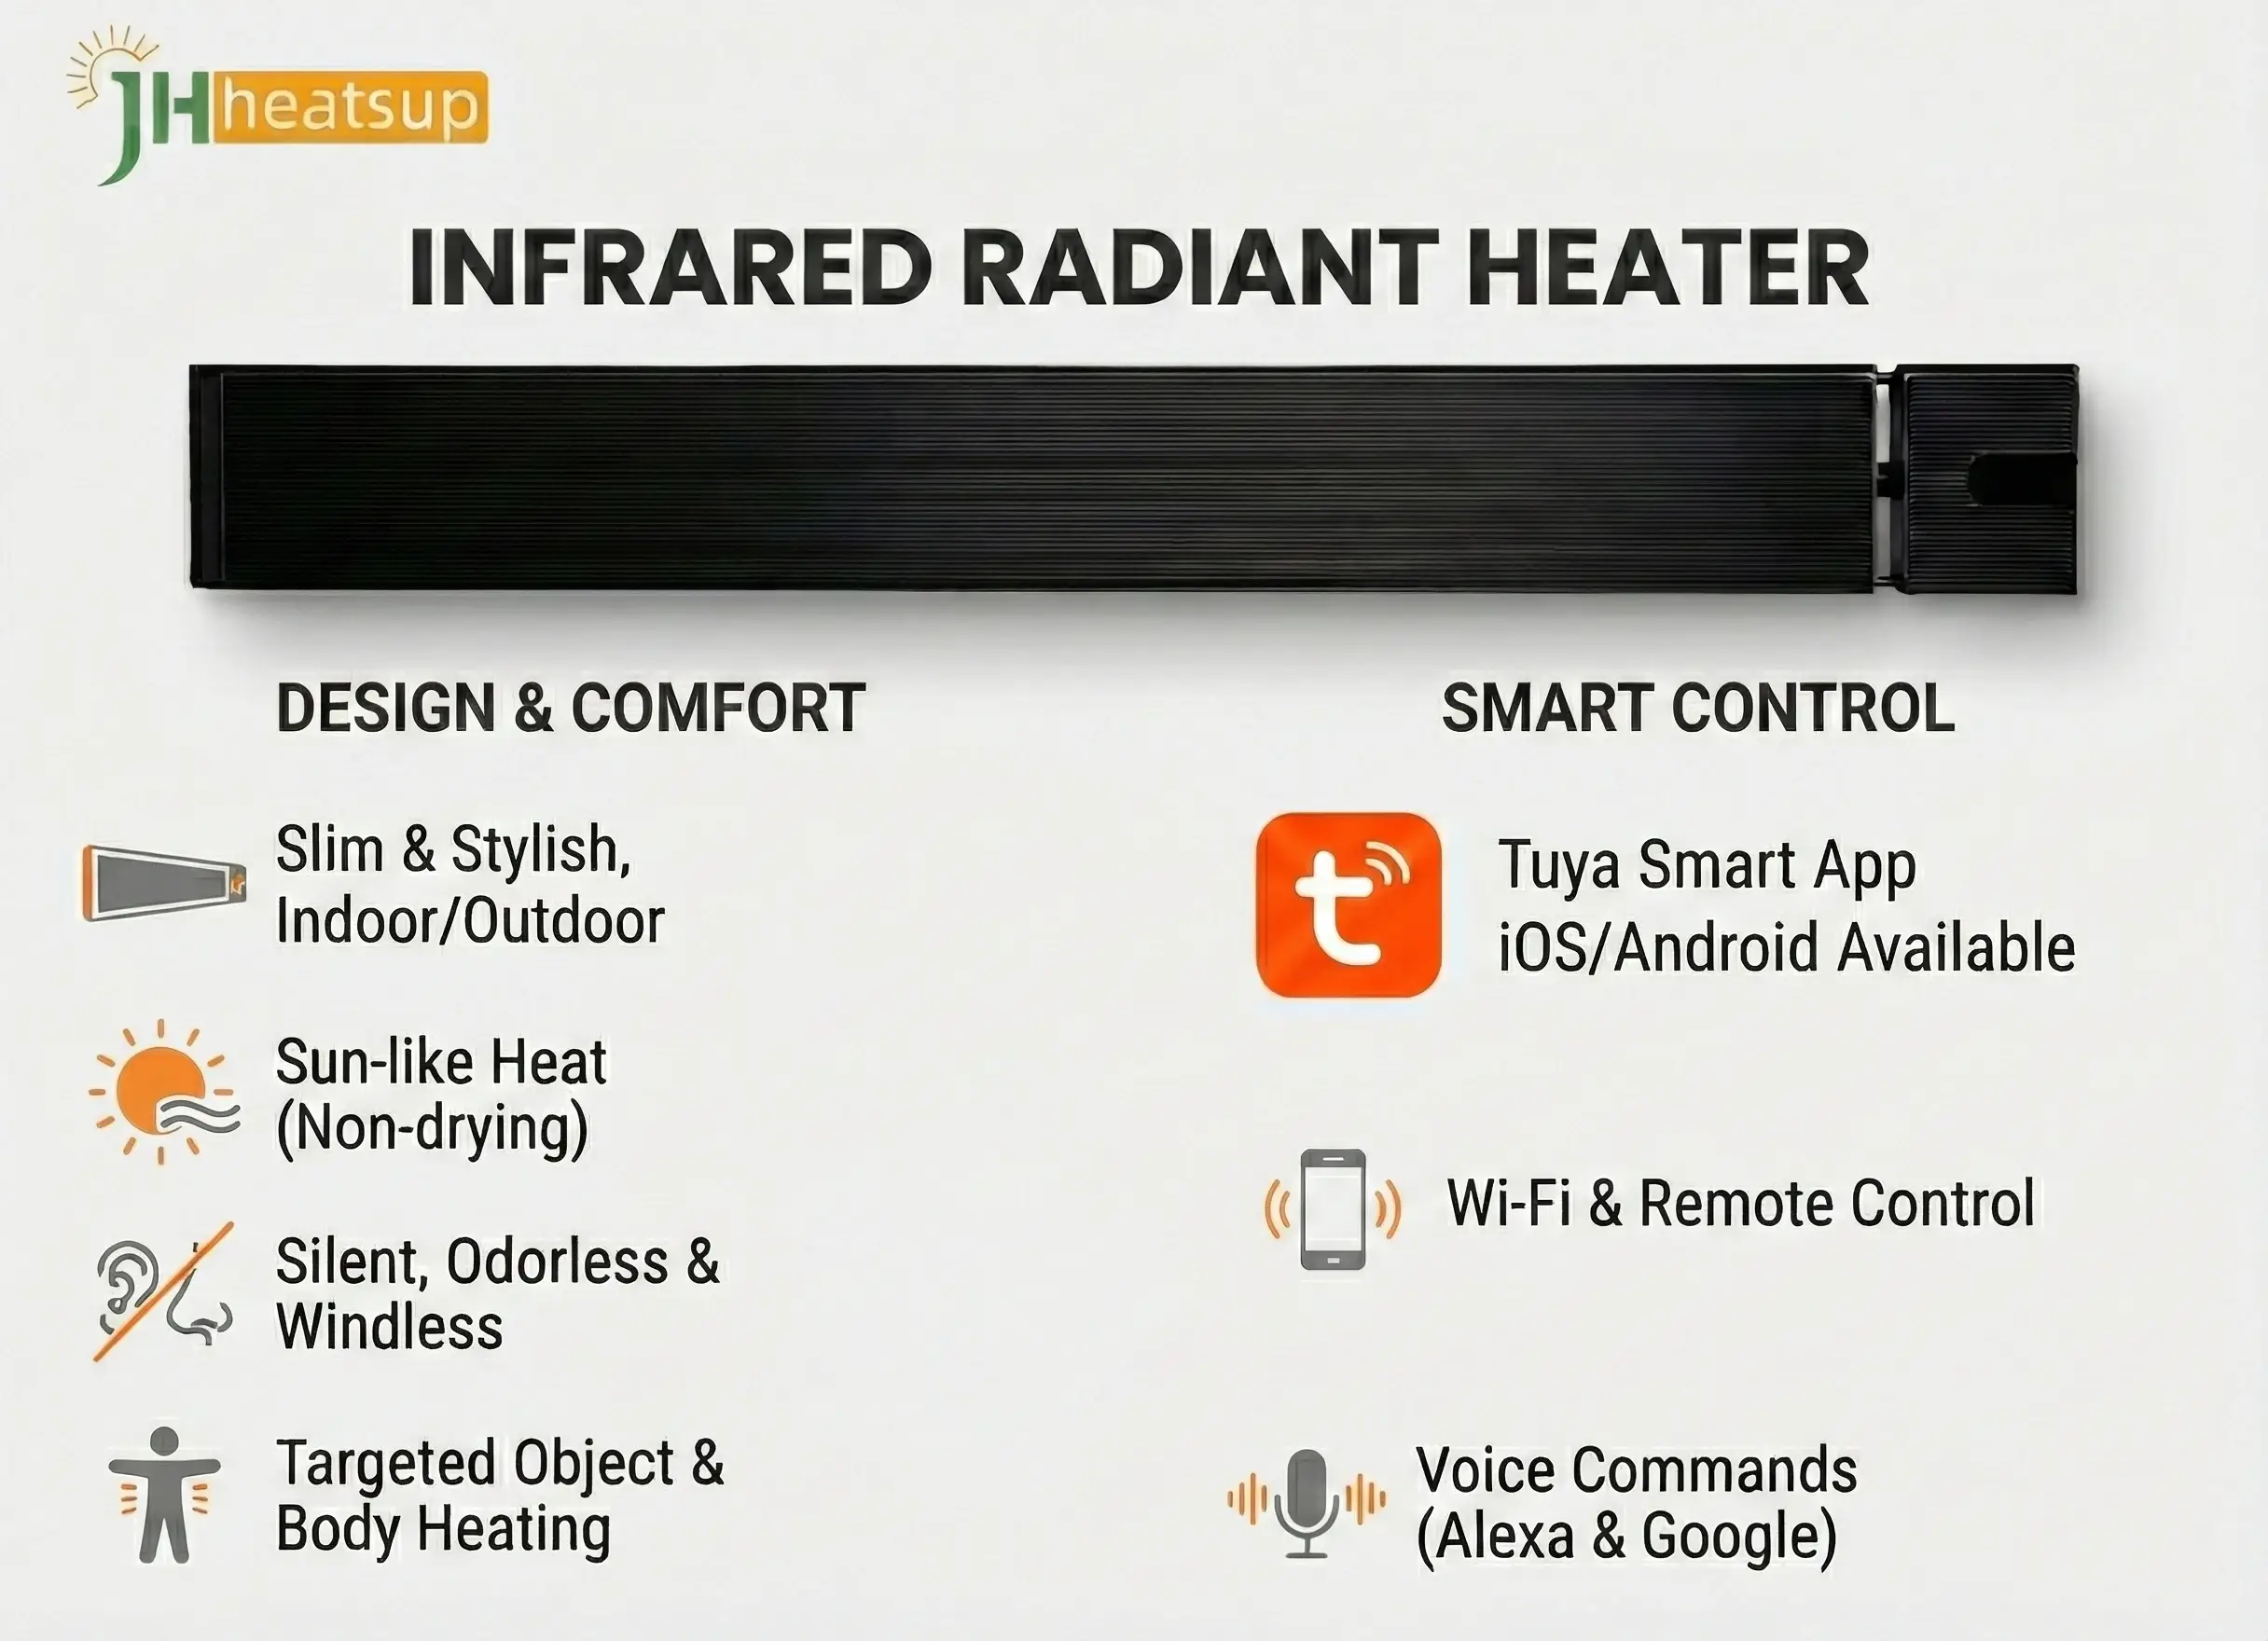
This appliance is not intended for use by persons (including children) with reduced physical sensory or mental capabilities, or lack of experience and knowledge, unless they have been given supervision or instruction. Children should be supervised to ensure they do not play with the appliance.
Thank you for choosing the JH 23W Series Infrared Heater. Far-infrared radiant heaters are produced using a unique design and manufacturing technique. Using a specially coated aluminum panel, the heat generated by the heating element is transferred radiantly to people and objects with maximum efficiency. The heat radiated from the panel surface is absorbed by people, walls, floors, and furniture, like sunshine.
Infrared heating does not cause air movement, keeping the air cleaner as dust and particles are not disturbed and circulated. Traditional convection heating relies on air movement to distribute heat. The air remains less humid, giving a sense of fresh, comfortable warmth — similar to the warmth felt from the sun.
No wind, light or odor during operation. Indoor air stays clean without floating dust.
High heat generation with excellent heat distribution. Uses less energy than traditional heating methods.
Indoor temperature can be freely adjusted, without the limitation of heating season.
Heat radiant changes body microcirculation, clears barriers, adjusts nervous system, and promotes metabolism. Very good for health.
| Model No. | Power (W) | Rated Current (A) | Voltage (V) | Cable Length (m) |
|---|---|---|---|---|
| JH-NR10-23W | 1600 | 4.3 | 220–240 | 1.8 |
| JH-NR18-23W | 1800 | 7.8 | 220–240 | 1.8 |
| JH-NR24-23W | 2400 | 10.4 | 220–240 | 1.8 |
| JH-NR32-23W | 3200 | 13.9 | 220–240 | 1.0 |
| Model No. | Dimension A (mm) | Dimension B (mm) |
|---|---|---|
| JH-NR10-23W | 693 | 300 |
| JH-NR18-23W | 1093 | 500 |
| JH-NR24-23W | 1593 | 750 |
| JH-NR32-23W | 2093 | 1000 |
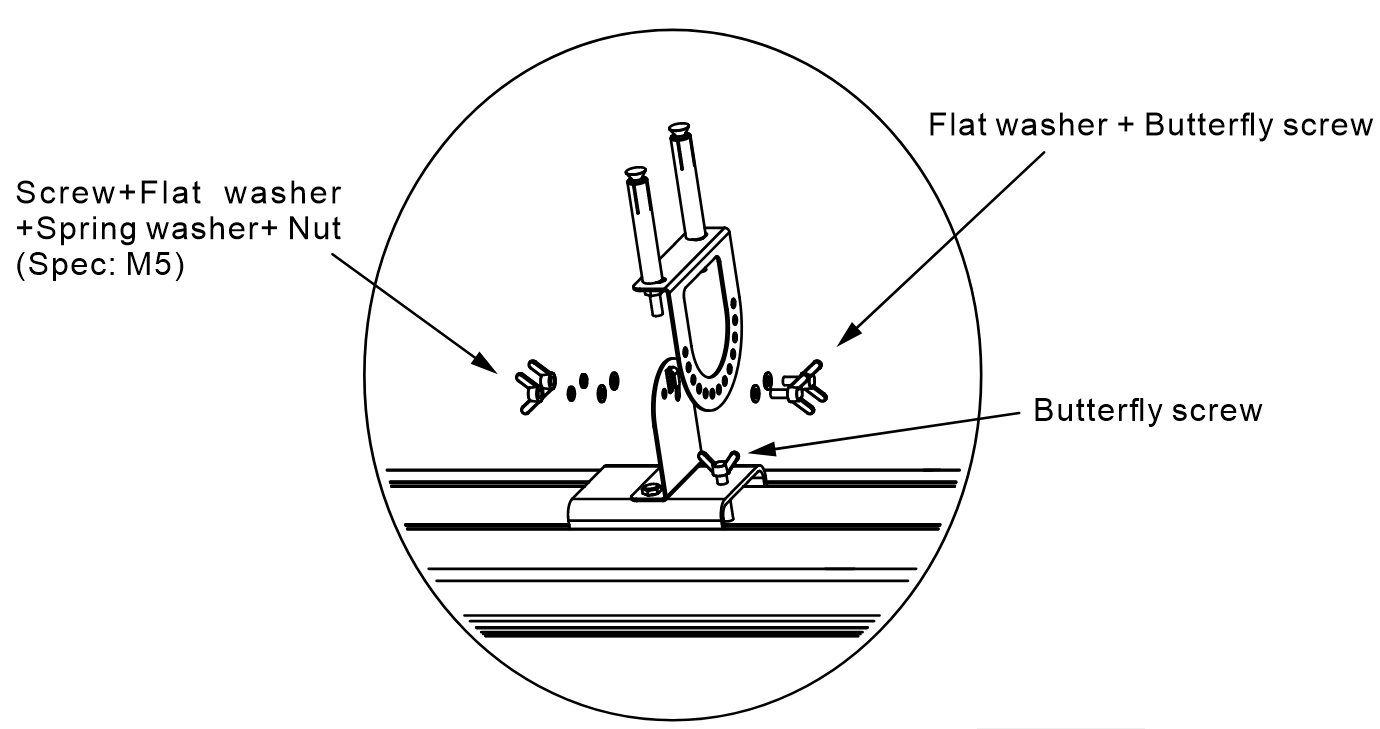
Connect adjusting bracket to sliding bracket.
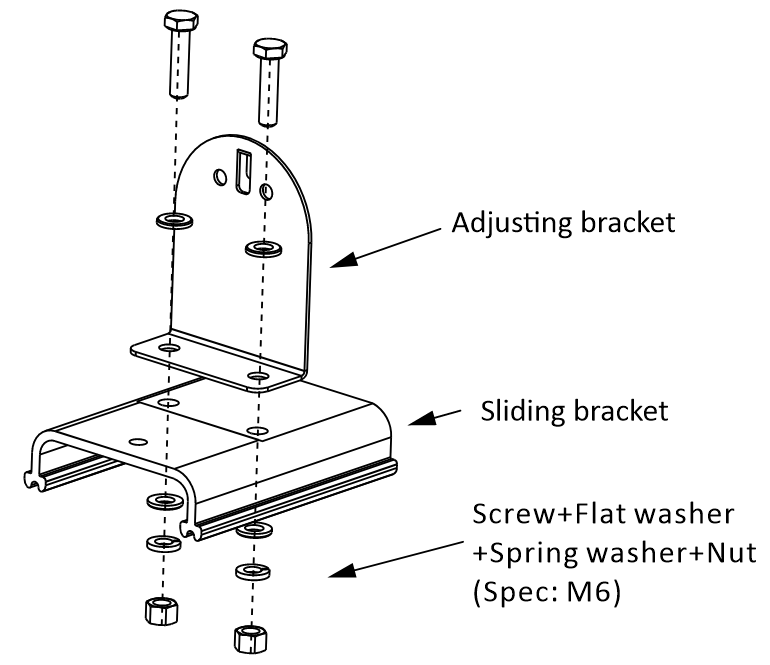
Install the sliding bracket and heater as indicated by the arrows.
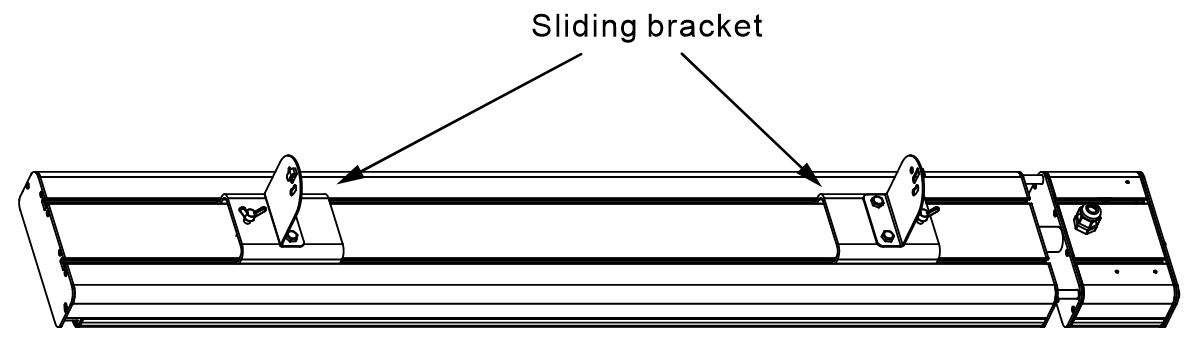
Fix the adjusting bracket to the wall using expansion screws.
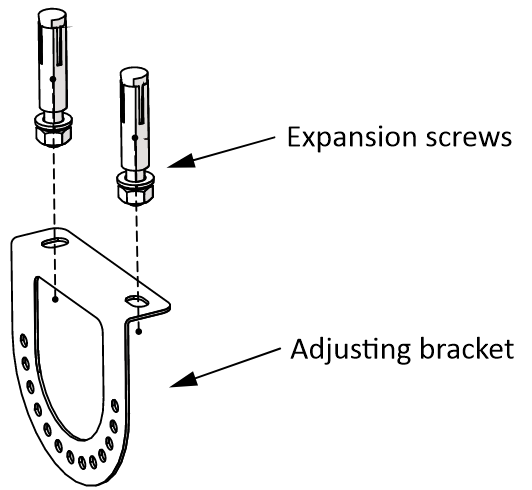
Install both adjusting brackets and tighten the butterfly hand screws firmly.
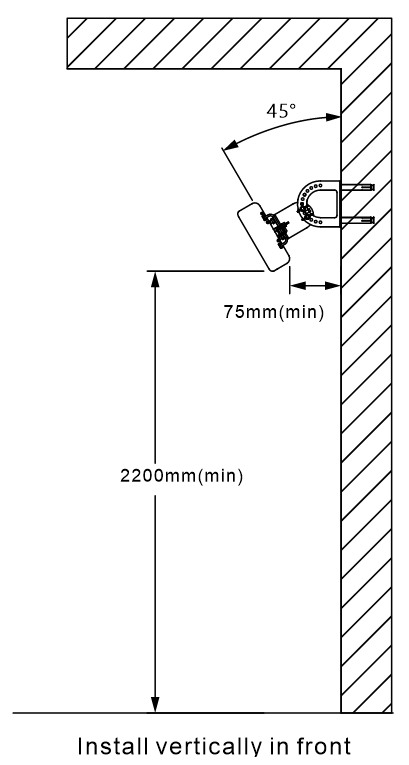
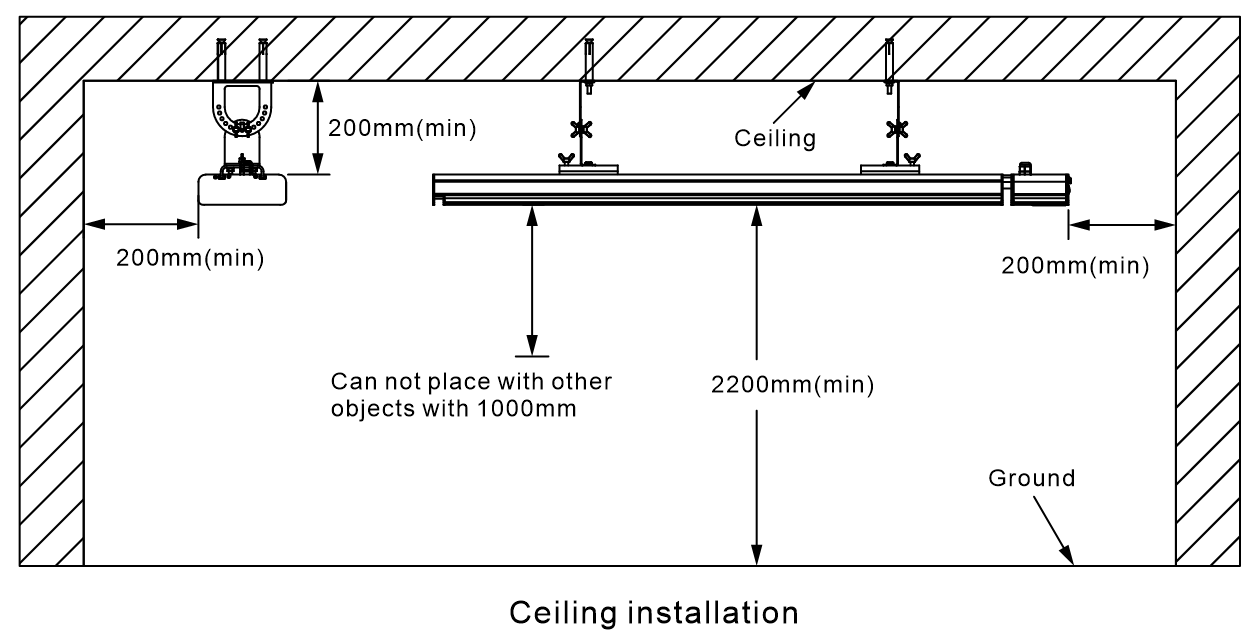
The heater can be installed on the wall or ceiling. Ensure the installation angle is adjusted correctly for optimal heating coverage.
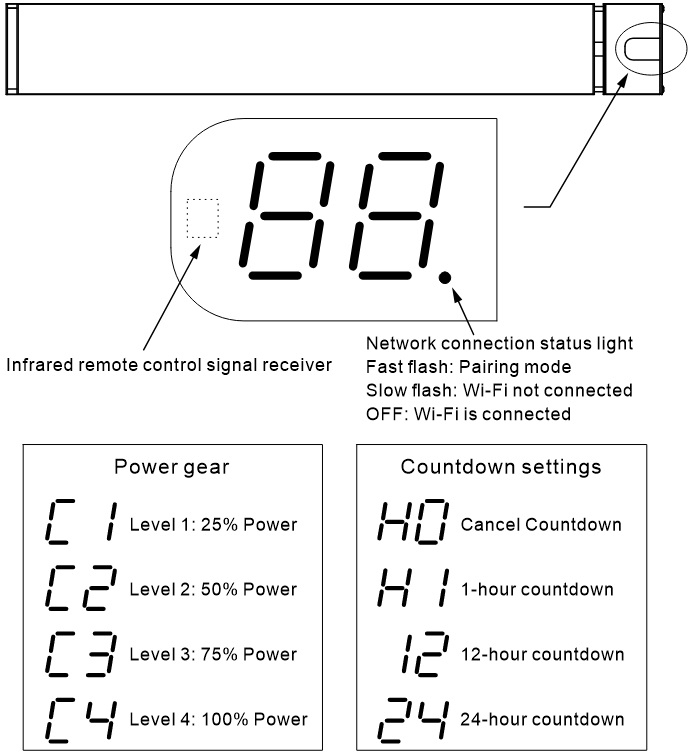
The heater is equipped with a digital display showing the current operating status, power level, Wi-Fi connection status, and countdown timer settings.
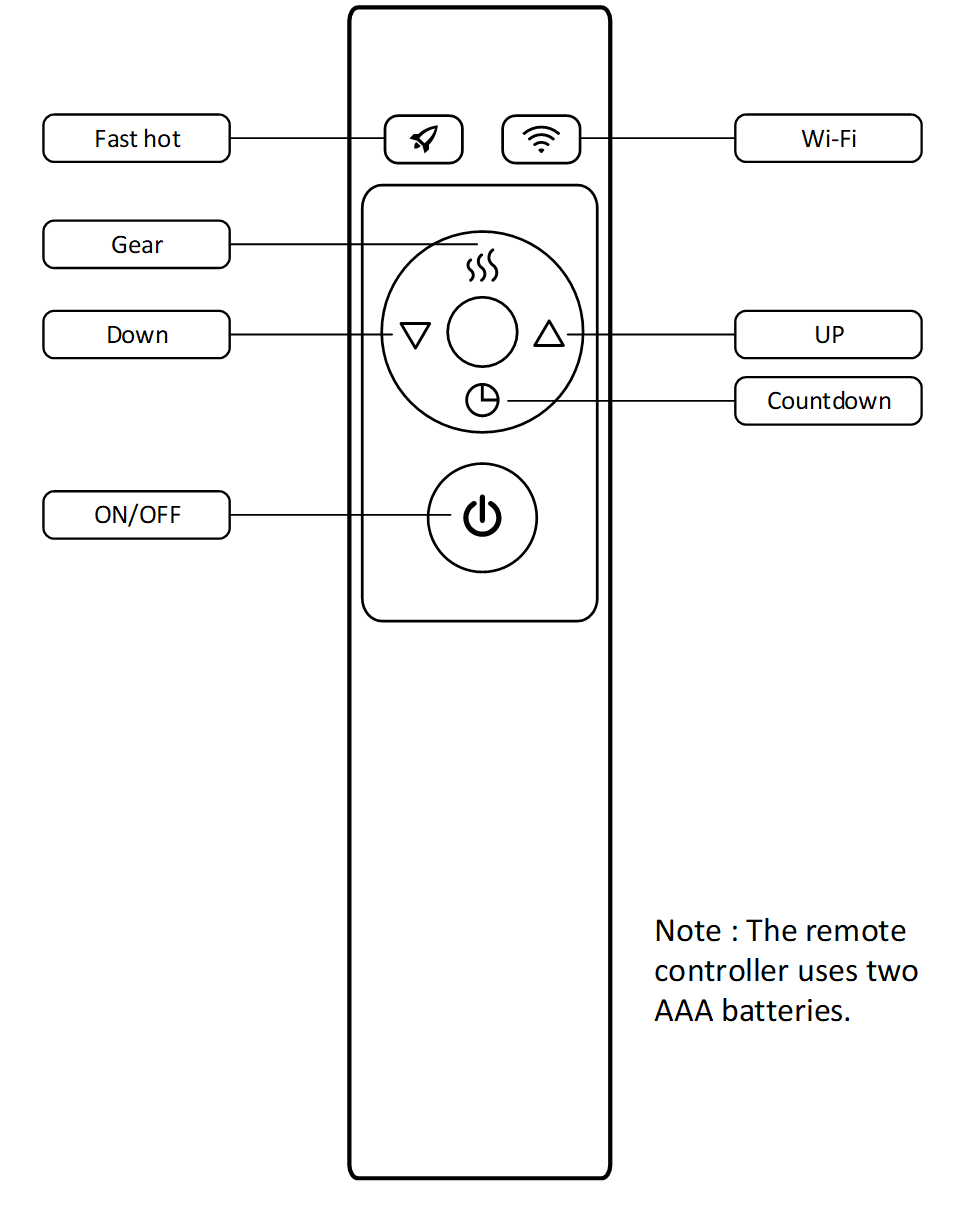
Press ON/OFF button to turn the heater on or off.
Press the Fast Hot button to run the heater at maximum power for 20 minutes, then it returns to the set power gear.
Press and hold the Wi-Fi button for at least 3 seconds to enable pairing mode. Then use the Tuya Smart App to connect the heater to the network. (See Chapter 11 for details)
Use the Gear button to adjust the power level when the heater is on.
Use Up or Down buttons to adjust the heater power level and to set the countdown hours.
When heater is OFF: set N-hour countdown to auto-turn-on. When heater is ON: set N-hour countdown to auto-turn-off. Range: 0–24 hours.
Download Tuya Smart App from your phone's app store (Google Play / App Store / AppGallery) or from https://smartapp.tuya.com/tuyasmart. You may also scan the QR code on the product packaging.
Register a new account or log in with your existing account.
Enable Bluetooth on your phone. Ensure Wi-Fi can connect to the Internet (heater supports 2.4G Wi-Fi only). Press and hold the Wi-Fi button on the remote for at least 3 seconds — the heater enters pairing mode.
Open the Tuya Smart App, select Add Device. The heater in pairing mode will be discovered automatically. Click Add, select the Wi-Fi network, enter the password, and click Next. Wait for the connection and press DONE when complete.
The App interface may change due to version updates, but the device-adding process remains largely the same.
| Items to be Checked | Consequence of Improper Installation |
|---|---|
| Is the installation stable? | The equipment may fall off or shake. |
| Is heat insulation adequate? | May damage objects close to the equipment. |
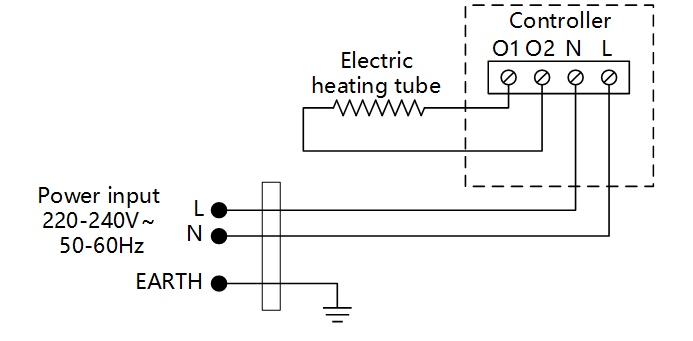
| Does power voltage match the product nameplate? | Equipment failure. |
| Is the wire connection correct? | Equipment failure. |
| Is the earth ground connected safely? | There is electricity leakage risk. |
Due to thermal expansion and contraction, the heater may make a slight noise when turning on or off. This is a normal phenomenon and will not negatively affect operation or performance.
| Model No. | Dimension (mm) | Package Size (mm) | Net Weight (kg) | Gross Weight (kg) |
|---|---|---|---|---|
| JH-NR10-23W | 693 × 151 × 52 | 760 × 215 × 140 | 3.4 | 4.2 |
| JH-NR18-23W | 1093 × 151 × 52 | 1160 × 215 × 140 | 5.3 | 6.4 |
| JH-NR24-23W | 1593 × 151 × 52 | 1660 × 215 × 140 | 7.6 | 9.5 |
| JH-NR32-23W | 2093 × 151 × 52 | 2160 × 215 × 140 | 9.9 | 12.5 |